seat Workshop Repair Guides

SEAT Workshop Service and Repair Manuals

Engine cylinder head, valve gear > < Sealing flange and flywheel
Removing and installing poly V-belt with tensioning element
Check the tool and equipment equivalence table according to the applicability between Seat / VW / Audi / Skoda → Chapter
Special tools and workshop equipment required
   
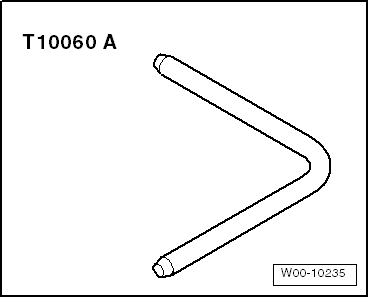
t  Interlocking mandril -T10060 A-, see equivalent → Anchor
Removal:
–  Noise insulation → General body repairs, exterior; Rep. gr.50.
–  Now, mark direction of rotation of poly V-belt.
  W00-10235
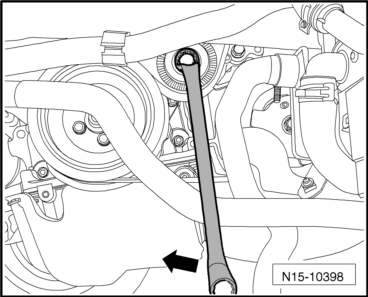
–  Swing tensioning element in direction of arrow to relieve tension on poly V-belt.
  N15-10398
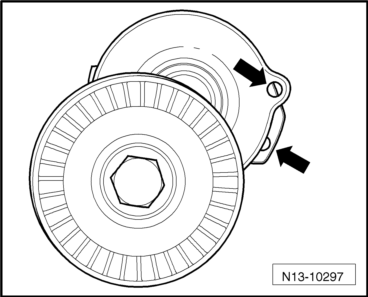
–  Align holes -arrows- and lock tensioning element in position with locking pin -T10060 A-.
–  Detach poly V-belt.
Installation
–  Installation is in the reverse sequence of removal.
  Note
t  Before installing poly V-belt, ensure that all ancillaries (alternator, air conditioner compressor) are secure.
t  When fitting poly V-belt, check direction of belt rotation and proper seating of belt in belt pulleys.
  N13-10297
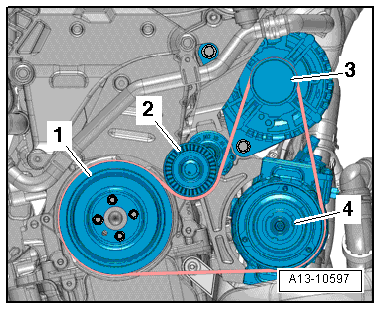
–  Fit poly V-belt on poly V-belt pulleys.
1 - Crankshaft
2 - Tensioner
3 - Alternator
4 - Air conditioning compressor
After completing repair:
–  Start engine and check belt running.
  A13-10597

Engine cylinder head, valve gear > < Sealing flange and flywheel