Leon Mk1
|
|
|
 Note
Note
|
|
 WARNING
|

|
|
|
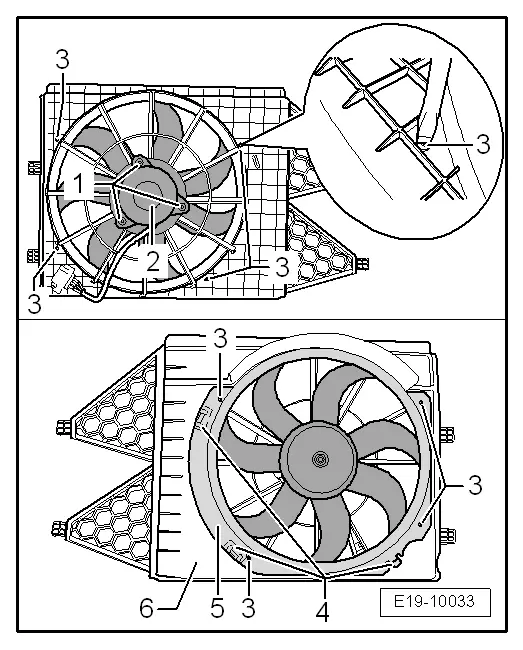
| Component | Nm |
| Coolant fan -V7- to air duct | 10 |

|
|
|
Note
|
|
|
|
|
|
| Component | Nm |
| Coolant fan -V7- to air duct | 10 |