seat Workshop Repair Guides

SEAT Workshop Service and Repair Manuals

Engine control unitJ623 > < Reading and clearing engine control unit fault memory
Jet projection image and seal: checking
   
Jet projection image and seal: checking
Special tools and workshop equipment required
t  Torque wrench kit -SAT 8010-
t  Auxiliary cable kit -VAG 1594C-
t  Digital potentiometer -VAG 1630-
t  Measuring container

Test condition
l  The fuel pressure must be in order, checking → Chapter.
Checking sequence
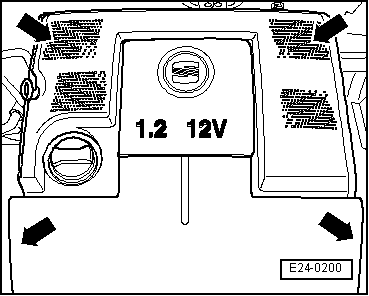
–  Remove air cleaner:
   
Engine codes AZQ, BME and BXV → Chapter.
  E24-0200
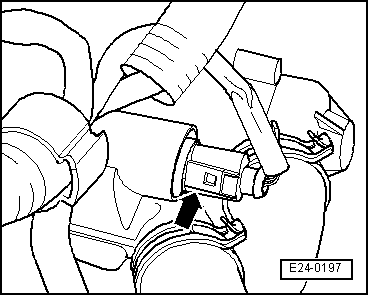
–  Pull 2-pin connector off coolant temperature sender -G62--arrow-.
  E24-0197
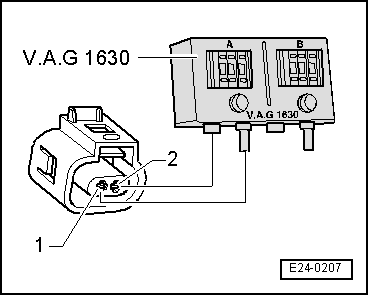
–  Connect the digital potentiometer -VAG 1630- to pins 1 + 2 of connector, using auxiliary cables from measuring tool set -VAG 1594C-, and adjust the side connected to 15 kΩ.
–  Unclip the wiring harness for the injectors from intake manifold and thermostat housing.
–  Remove fuel rail complete with all injectors from cylinder head (fuel hoses remain connected) → Item.
  E24-0207
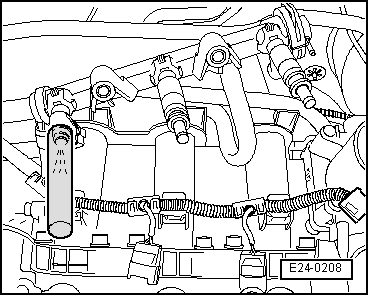
–  Hold a small container under the injector to be checked and pull connectors off all other injectors.
–  Have 2nd person operate starter. Injector must spray in pulses.
–  Repeat check on the other injectors. In the process, take care that only the valve to be checked is connected.
–  Then check injectors for leaks. No more than 2 drops/min may leak out.
If the fuel loss is greater:
–  Switch ignition OFF.
–  Renew defective injector → Item.
Installation of the injectors is carried out in the reverse order to removal, observing the following:
t  Renew O-rings on all injectors and lightly moisten with clean engine oil.
t  Insert injectors vertically and in the correct position into the fuel rail and secure with retaining clips.
t  Fit fuel rail to the cylinder head with all the injectors correctly placed and bolt uniformly.
  E24-0208

Engine control unitJ623 > < Reading and clearing engine control unit fault memory