
Leon Mk1
| Fuel tank with accessory parts and fuel filter: removing and installing |
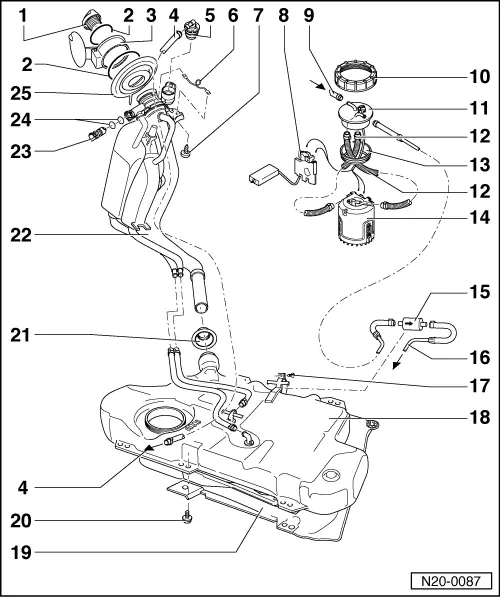
| 1 - | Cap |
| 2 - | Securing ring |
| 3 - | Tank flap unit |
| q | Removing and installing: → General Body Repairs- installation work; Rep. Gr.55 |
| 4 - | Breather pipe |
| q | To the activated charcoal filter system → Item |
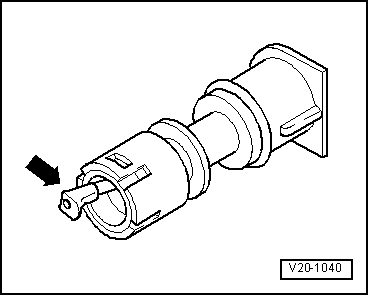
| 5 - | Gravity/overload valve |
| q | To remove, release locking lug and unclip valve upwards out of filler neck |
| q | Check valve for through flow |
| Perpendicular valve: open |
| Valve tilted 90°: closed |
| 6 - | Earth connection |
| q | Check for secure seating |
| 7 - | 4 Nm |
| 8 - | Fuel gauge sender |
| q | Removing and installing → Chapter |
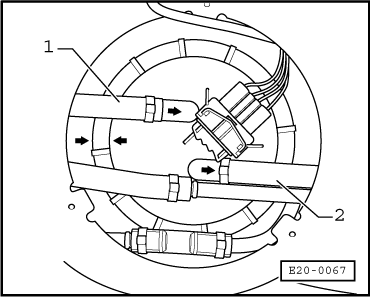
| 9 - | Return hose |
| q | Blue or with blue marking |
| q | From the fuel rail: → Rep. Gr.24 |
| 10 - | Union bolt, 75 Nm |
| q | Remove and install with -U-40055A- spanner |
| 11 - | Flange |
| q | Note fitting position on fuel tank → Fig. |
| 12 - | Corrugated tube |
| q | Must not touch fuel tank so as not to transmit pump noises |
| 13 - | O-ring |
| q | Renew if damaged |
| q | Coat with fuel when installing |
| 14 - | Fuel delivery unit |
| q | Note fitting position on fuel tank → Fig. |
| q | Removing and installing → Chapter |
| q | Checking fuel pump → Chapter |
 Note!
Note!| After completing work in either the fuel delivery unit or the fuel gauge indicator, ensure that the corrugated tubes between the delivery unit and the flange are not in contact with the fuel tank (resulting in pump noises being transmitted). |
| 15 - | Fuel filter |
| q | Assembly position: arrow indicates through-flow direction |
| 16 - | Supply pipe/hose |
| q | Black |
| q | To fuel rail: → Rep. Gr.24 |
| 17 - | 3 Nm |
| 18 - | Fuel tank |
| q | Removing and installing → Chapter |
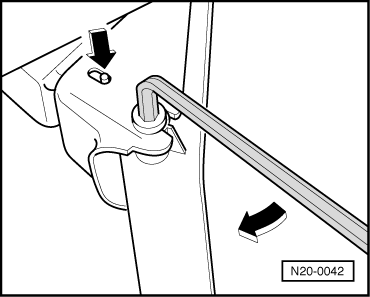
| 19 - | Heat shield |
| q | Press the heat shield's securing washer firmly against the pin located in the vehicle underbody. |
| 20 - | 25 Nm |
| 21 - | Dust sleeve |
| q | After fitting the filling neck, fit it over the fuel tank neck |
| 22 - | Filler neck |
| q | With anti-return valve |
| 23 - | Breather valve |
| q | Checking → Fig. |
| q | To remove, lightly press the locking latch towards the inside and pull the valve out |
| q | Before installing, unscrew cap → Item |
| 24 - | O-ring |
| q | Renew if damaged |
| 25 - | Dust sleeve |
| q | For filler neck |
Note!
|
|
|
|