seat Workshop Repair Guides

SEAT Workshop Service and Repair Manuals

Piston and connecting rod: disassembly and assembly > < Engine: Removing and installing
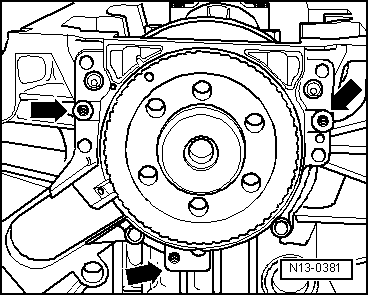
Remove the sealing flange with the sender rotor
  Note!
To facilitate compression, the work sequence is carried out with the engine removed.
Work sequence
–  Remove the engine flywheel. To do so, immobilise it with countersupport -T20075-.
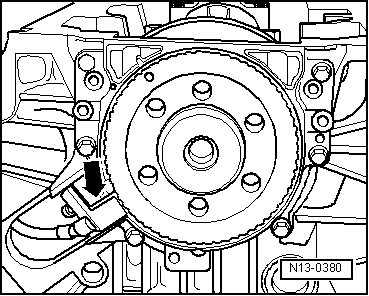
–  Position the engine at TDC cyl. 1 → Chapter.
–  Remove the oil sump → Chapter.
   
–  Remove the engine revs sender -arrow-.
–  Unscrew the sealing flange mounting bolts.
  N13-0380
–  Fit three M6×35 mm bolts in the threaded holes of the sealing flange-arrows-.
–  Tighten the bolts, in an alternating pattern (max. 1/2 turn (180°) per bolt), on the sealing flange and remove it from the crankshaft with the sender rotor.
  N13-0381

Piston and connecting rod: disassembly and assembly > < Engine: Removing and installing