seat Workshop Repair Guides

SEAT Workshop Service and Repair Manuals

Engine cooling > < Removing and installing cylinder head
Oil supply pipe: removing and fitting
Consult the equivalence table for tools and equipment according to applicability among Seat / VW / Audi / Skoda → Chapter.
Special tools and workshop equipment required
   
t  Torque wrench kit -SAT 8010-, see equivalent → Anchor
  L00-10226
t  Pliers -T20174- or pliers -SAT 1105-, see equivalent → Anchor
t  Removing → Anchor
t  Installing → Anchor
Removing
–  Remove air cleaner housing → Chapter.
–  Remove the air hose from the turbocharger and the intercooler → Item.
–  Unscrew the bolts → Itemand remove the cable clip.
–  Remove the air hose from the engine compartment downwards.
  W00-2456
–  Disconnect electrical connection -1- from the oil pressure switch -F1-.
–  Undo fastening bolt of oil filter bracket -3- and fastening bolt of clamp -4-.
  A21-0301
–  Release the fasteners -arrows- to remove the central soundproofing panel.
  E10-0086
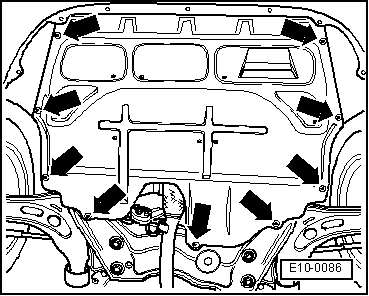
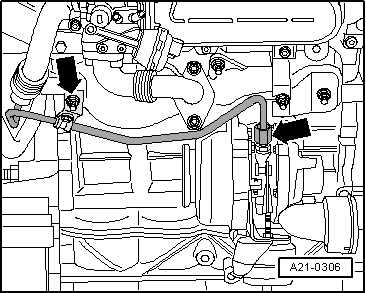
–  Undo the fastening bolts of the turbocharger and of the bracket -arrows-.
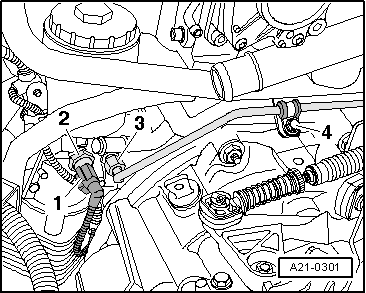
–  Remove oil supply pipe.
Installing
Install in the reverse order from removal, remembering the following:
  Note
The procedure sequence should be followed in order to guarantee a stress-free assembly of the fuel supply pipe.
–  Fix the coupling bolts of the oil supply pipe onto the oil filter bracket connections and the turbocharger by hand.
  A21-0306
–  First tighten the coupling bolt -3- of the oil filter bracket to 22 Nm.
  A21-0301
–  Tighten turbocharger coupling nut -1- to 22 Nm.
–  Fit the clamps on the brackets and tighten the fastening bolts to 10 Nm.
–  Fit the air hose of the turbocharger → Item.
–  Install air cleaner housing → Chapter.
–  Check oil level → Fig.
  A21-0306

Engine cooling > < Removing and installing cylinder head