seat Workshop Repair Guides

SEAT Workshop Service and Repair Manuals

Pistons and conrods > < Removing and installing sealing flange (gearbox end)
Removing and installing tensioner for poly V-belt
t  Removing → Anchor
t  Installing → Anchor
Check the tool and equipment equivalence table according to the applicability between Seat / VW / Audi / Skoda → Chapter
Special tools and workshop equipment required
   
t  Adjustment tool -T40098-, please see Correspondence → Anchor
  W00-10333
Removing
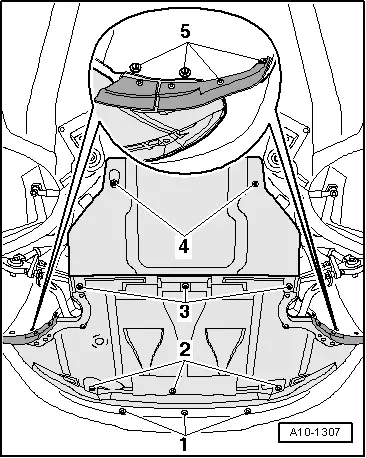
–  Loosen the fasteners -2-, -3- and -5- and remove the front noise insulation.
  Note
For this procedure, the charged air and coolant hoses must not be removed.
–  Move the lock carrier plate into service position without removing the charged air and coolant hoses → Rep. gr.50.
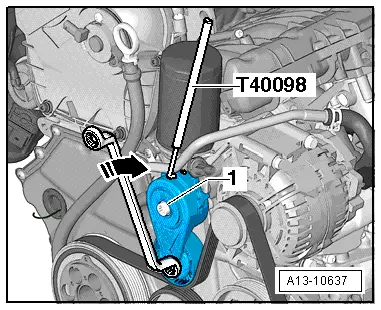
  Caution
Risk of breakage if the poly V-belt runs in the opposite direction when refitted.
Before removing, mark direction of operation of poly V-belt with chalk or felt-tipped pen in preparation for re-installation.
  A10-1307
–  To slacken poly V-belt turn tensioner in direction of -arrow-.
–  Lock tensioner with locking tool -T40098-.
–  Detach poly V-belt from tensioner.
–  Remove bolt -1- and take off tensioner for poly-V-belt from bracket for ancillaries.
Installing
Installation is carried out in the reverse sequence; note the following:
l  Tightening torque → Chapter
–  Installing the Poly-V belt → Chapter.
–  Put the lock carrier plate into service position → Rep. gr.50.
  A13-10637

Pistons and conrods > < Removing and installing sealing flange (gearbox end)