seat Workshop Repair Guides

SEAT Workshop Service and Repair Manuals

Checking compression > < Removing and installing cylinder head cover
Removing and installing cylinder head
t  Removing → Anchor
t  Installing → Anchor
   
Consult the equivalence table for tools and equipment according to applicability among Seat / VW / Audi / Skoda → Chapter.
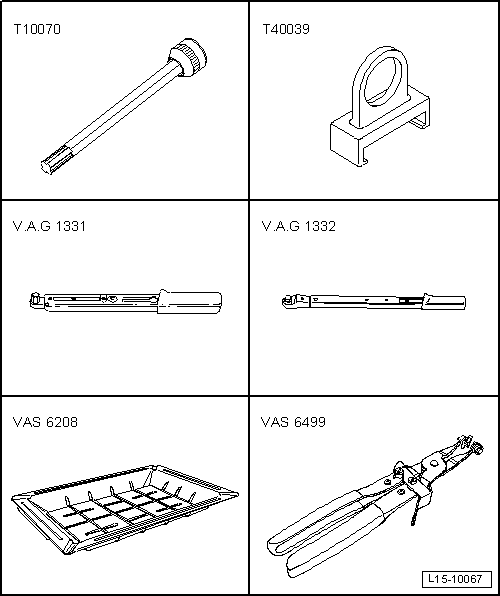
Special tools and workshop equipment required
t  Spanner -T10070-, see equivalent → Anchor
t  Extractor -T40039-, see equivalent → Anchor
t  Torque wrench -VAG 1331-, see equivalent → Anchor.
t  Torque wrench -VAG 1332-, see equivalent → Anchor.
t  Collecting tray -VAS 6208-, see equivalent → Anchor
t  Pliers for spring-loaded band-type clamps -VAS 6499-, see equivalent → Anchor

  Caution
When doing any repair work, especially in the engine compartment, pay attention to the following due to the cramped conditions:
t  Route all the various lines (e.g. for fuel, hydraulics, active carbon filter system, coolant, refrigerant, brake fluid and vacuum pipes and hoses) and electrical wiring so that the original positions are restored.
t  In order to avoid damage to the lines, ensure sufficient clearance for all moving or hot components.
Removing
l  Engine at tepid temperature at most.
  Note
t  All cable ties which were opened or cut during removal must be renewed at the same points.
t  When the engine oil is polluted, perform an oil change → Booklet101.
–  First check whether a coded radio is fitted. With the ignition OFF, disconnect the earth connection from the battery
–  With the ignition switched off, disconnect the battery earth lead → Electrical system; Rep. gr.27.
–  Remove the front panel of the plenum chamber → Bodywork, exterior fitting work; Rep. gr.50.
–  Remove extraction hose → Chapter.
–  Drain coolant → Chapter.
   
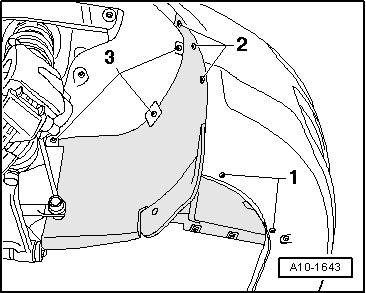
–  Remove front right-hand side soundproofing -1 ... 3-.
–  Remove the primary exhaust pipe with catalytic converter → Chapter.
  A10-1643
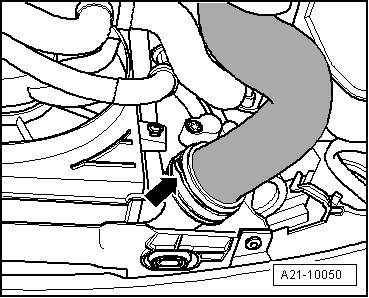
–  Remove the charge air hose -arrow- from the charge air cooler.
  A21-10050
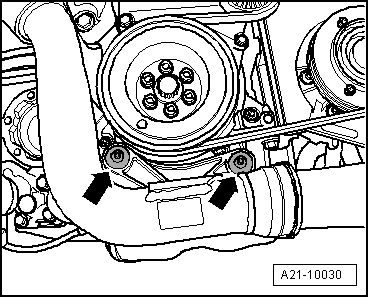
–  Loosen the bolts -arrows-, and remove the air duct.
–  Disconnect all electrical connections as necessary from turbocharger, and lay to one side.
  A21-10030
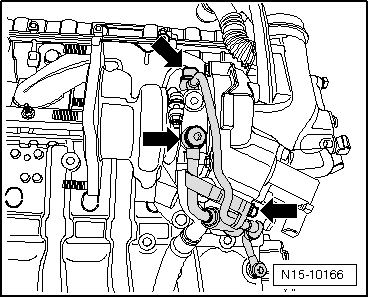
–  Loosen the oil supply piping and the coolant supply piping -arrows-.
  N15-10166
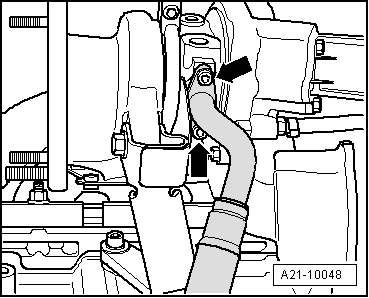
–  Remove the oil return pipe -arrows- from the turbocharger.
  A21-10048
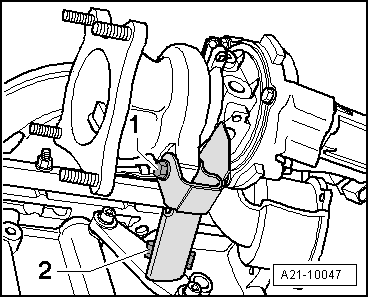
–  Loosen the bolts -1- and -2-, and remove the turbocharger bracket.
  A21-10047
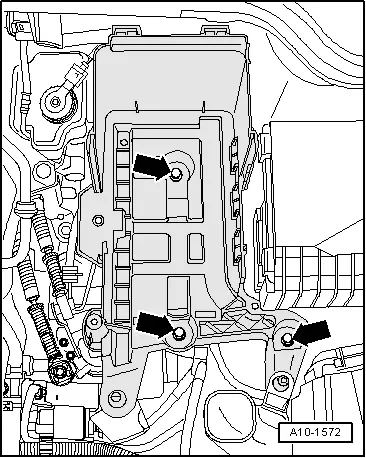
–  Remove the battery and its support.
  A10-1572
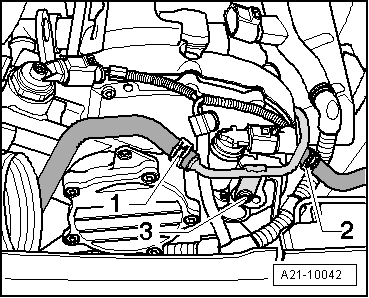
–  Disconnect the coolant hoses -1- and -2-.
–  Disconnect all other electrical connections as necessary from cylinder head, and lay to one side.
  A21-10042
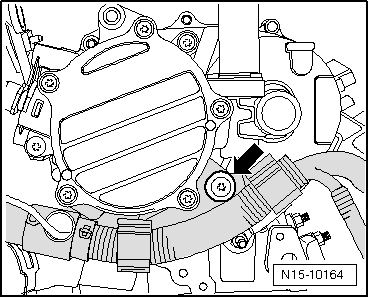
–  Loosen the wiring guide, and lay wiring harness to one side.
  N15-10164
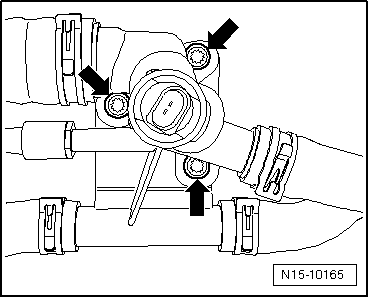
–  Loosen the coolant flange -arrows-.
–  Remove poly V-belt → Chapter.
–  Remove toothed belt → Chapter.
–  Remove cylinder head cover → Chapter
  N15-10165
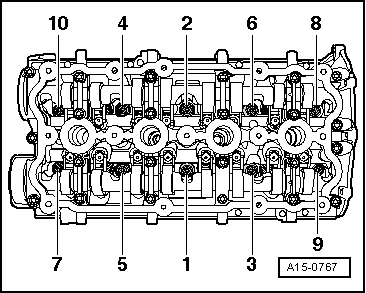
–  Respect the loosening order for the cylinder head bolts.
  Note
Ensure that all wiring connections and hose attachments between the engine, the gearbox and the body have been loosened.
–  Remove the cylinder head.
Installing
  Note
t  No oil or coolant must be allowed to remain in the blind holes for the cylinder head bolts in the cylinder block.
t  Do not remove the new cylinder head gasket from its packing until immediately before its installation.
t  Handle the new gasket with extreme care. If damaged, leaks may result.
t  Renew cylinder head bolts.
–  Place clean cloths in cylinders so that no dirt or emery cloth particles can get in between cylinder wall and piston.
–  Also prevent dirt and particles from getting into the coolant.
–  Carefully clean cylinder head and cylinder block sealing surfaces. Ensure no long grooves or scratches are produced (if using sandpaper, it must be at least 100 grit).
–  Carefully remove any abrasive metal particles and then the cloths.
–  If the crankshaft has rotated: Position the cylinder number 1 into TDC and then rotate the crankshaft a little backwards.
–  Fit a new cylinder head gasket. The inscription (Part number) must be legible.
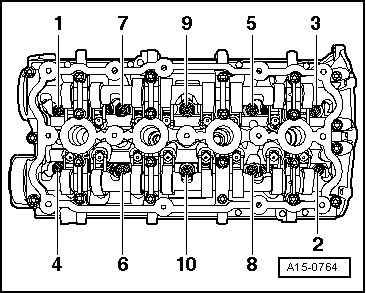
  A15-0764
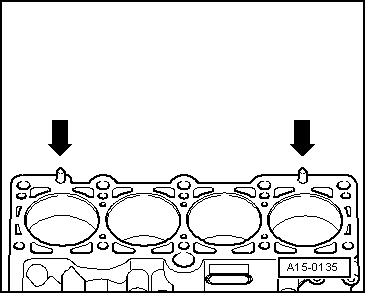
–  Pay attention to centring pins in cylinder block -arrows-.
–  Fit cylinder head.
–  Insert the bolts and tighten them by hand.
  A15-0135
–  Then tighten the bolts in the specified order, as explained below:
  A15-0767
StageTighten
1
–  Tighten to 40 Nm with torque wrench.
2
–  Retighten with rigid spanner 90° (1/4 turn)
3
–  Retighten with rigid spanner 90° (1/4 turn)

–  Install cylinder head cover . Tightening torque: → Fig.
–  Install toothed belt → Chapter.
Continue installation following reverse order for removing.
Filling with new coolant → Chapter.
   

Checking compression > < Removing and installing cylinder head cover