Leon Mk1
| Assembly overview |

| 1 - | 40 Nm +1/4 turn further (90º) |
| q | Rotate to the left |
| q | Replace |
| 2 - | Camshaft adjuster |
| q | Must not be dismantled |
| q | removing and fitting → Chapter |
| 3 - | Camshaft wheels |
| q | Note position when installing timing chain. |
| 4 - | O ring |
| q | Replace if damaged |
| q | Before installing, coat lightly with engine oil. |
| 5 - | Camshaft control valve 1 -N205- |
| 6 - | 10 Nm |
| 7 - | 10 Nm + further 1/4 (90 °) |
| q | Replace |
| q | Tighten from centre outwards |
| 8 - | Camshaft housing |
| q | removing and fitting → Chapter |
| q | Remove old sealant residues |
| q | Before fitting, apply sealant → Catalogue of spare parts |
| 9 - | 10 Nm |
| 10 - | Sealing plug |
| q | For inlet camshaft. |
| q | For exhaust camshaft. |
| 11 - | Roller rocker arms |
| q | Check roller bearing. |
| q | Lubricate contact surface |
| q | Use securing clip to clip onto support element when installing |
| 12 - | Woodruff keys |
| 13 - | Valve stem seal |
| q | Replace |
| 14 - | Supporting element |
| q | Check oil spray holes. |
| q | With hydraulic valve clearance compensation. |
| q | Do not interchange |
| q | Before installing, check camshaft axial clearance → Chapter. |
| q | Lubricate contact surface |
| 15 - | Valve guide |
| q | Checking → Chapter |
| 16 - | Valve spring |
| q | Removing and fitting with the cylinder head removed using the valve installation tool -3362-. |
| q | When cylinder head is installed → Chapter |
| 17 - | Cylinder head |
| q | removing and fitting → Chapter |
| q | Reworking valve seat → Chapter. |
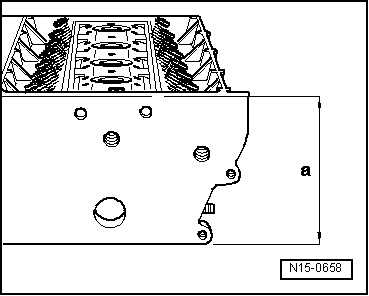
| q | Reworking sealing surface → Fig. |
| 18 - | Valves: |
| q | Not to be reworked; only grinding-in permissible |
| q | Valve dimensions → Fig. |
| 19 - | Exhaust camshaft |
| q | Do not confuse with the intake camshaft |
| q | check the axial play → Chapter |
| q | Coat with oil before inserting (also axial bearing shoulder). |
| 20 - | Guide sleeve |
| 21 - | Supply camshaft |
| q | With cam for high-pressure pump |
| q | Before removing, the socket tappets of the high pressure pump should be removed and replaced |
| q | Do not confuse with the exhaust camshaft |
| q | check the axial play → Chapter |
| q | Coat with oil before inserting (also axial bearing shoulder). |
| 22 - | 50 Nm + further 1/4 (90 °) |
 Note
Note
|

|
