| –
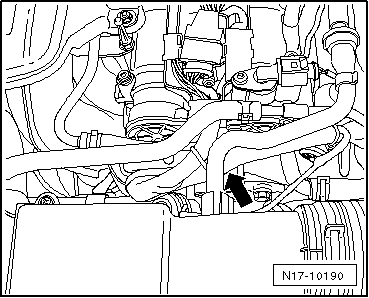
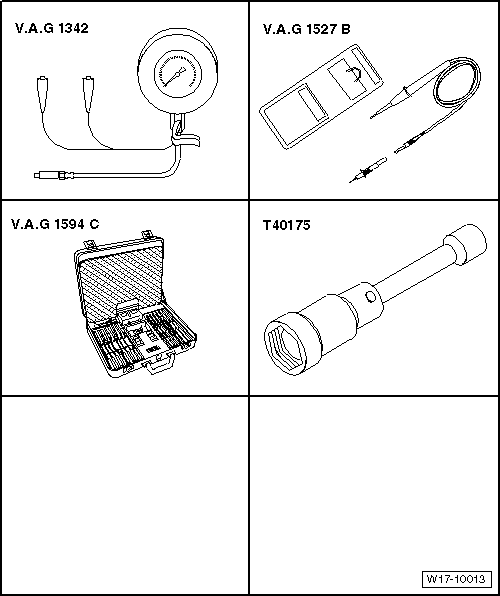
| Remove oil pressure switch -F1- using 24 mm jointed spanner -T40175- and screw into oil pressure tester -V.A.G 1342-. |
| –
| Screw tester into cylinder head in place of oil pressure switch. |
| –
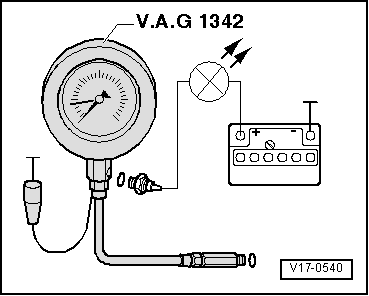
| Connect brown wire of tester to earth (-). |
| –
| Connect voltage tester -V.A.G 1527B- to battery positive (+) and oil pressure switch using cables from auxiliary measuring set -V.A.G 1594C-. |
| –
| If LED lights up, replace pressure switch -F1-. |
| If LED does not light up: |
| –
| Start engine and increase engine speed slowly. between 0.3... 0.7 bar, the LED must light-up. If not, replace the oil pressure switch. |
| –
| Increase engine speed further. At 2000 rpm and an oil temperature of 80 °C the oil pressure should be at least 2.0 bar. |
| At higher engine speed, oil pressure must not exceed 7.0 bar. |
| Tightening torque: oil pressure switch: 20 Nm |
|
|
|

 Note
Note