seat Workshop Repair Guides

SEAT Workshop Service and Repair Manuals

Ignition system, glow plug system > < Exhaust system (Engine codes BGU, BSE, BSF, CCSA)
Lambda probes after the catalytic converterG130: Removing and installing
Lambda probes after the catalytic converter -G130-: Removing and installing
Special tools and workshop equipment required
   
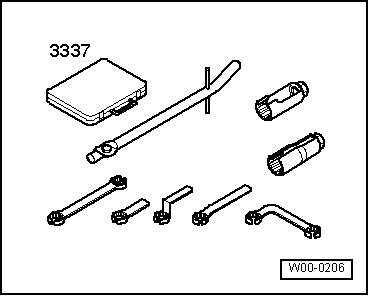
t  Wrench kit -3337-
  W00-0206
Removal:
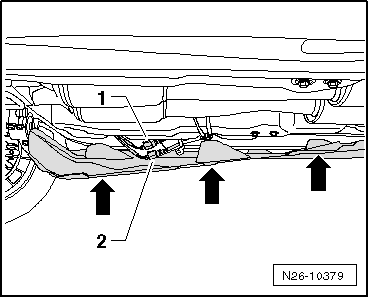
–  Unscrew the 3 screws of the right cover on the vehicle underfloor -arrows-.
  N26-10379
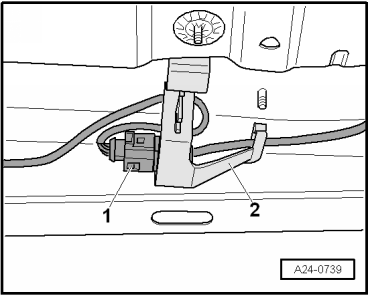
–  Disconnect electrical connection -1- for lambda probe after catalytic converter -G130-.
–  Remove the connector from the retainer -2-and release the cable from the Lambda probe.
  A24-0739
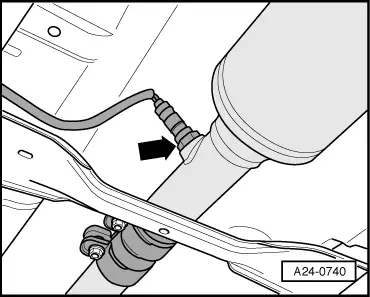
–  Unscrew the lambda probe after the catalytic converter -G130--arrow- using the tool from the wrench kit -3337-.
Installing
Installation is carried out in the reverse order of removal while noting the following:
  Note
t  When replacing the Lambda probe, delete the learnt values in the engine controller → vehicle diagnosis device, „Guided function“.
t  The screw thread on the new lambda probe is coated with a special paste. The paste must not get into the slots on the probe body.
t  When reusing the lambda probe, only grease the thread with hot bolt paste -G 052 112 A3-; the paste must not get into the slots on the sender body Locking fluid for hot working bolts → ETKA (Electronic parts catalogue)
t  When assembling, the Lambda sender line must be fixed in its original position to avoid contact with the exhaust pipe.
t  Tightening torques: 55 Nm
  A24-0740

Ignition system, glow plug system > < Exhaust system (Engine codes BGU, BSE, BSF, CCSA)