seat Workshop Repair Guides

SEAT Workshop Service and Repair Manuals

Supporting engine in installation position > < Attaching engine to repair stand
Engine: fitting
Engine: fitting
Assembly mountings → Chapter.
Installation is carried out in the reverse order; note the following:
  Caution
Due to the enclosed spaces, observe the following during all assembly work, particularly in the engine compartment:
t  Route lines of any kind so that the original routing can be restored.
t  Ensure that there is sufficient clearance to all moving or hot components.
–  Use new dowel sleeves to centre the engine/gearbox assembly in the engine block.
   
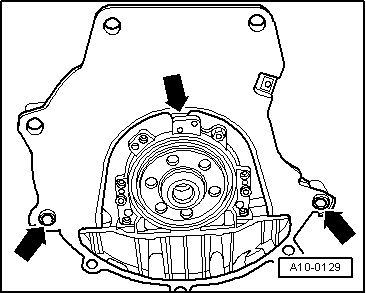
–  Fit intermediate plate onto sealing flange and slide onto dowel sleeves -arrows -.
–  Renewing needle bearing in crankshaft → Chapter.
–  Adjust selector lever cable following installation → Power transmission; Rep. gr.34.
–  When installing engine and gearbox assembly, ensure sufficient clearance to subframe and radiator.
–  Adjust the mechanical group mountings → Chapter
Electrical connections and routing: → Electrical system; Rep. gr.97.
–  Connect the → Vehicle diagnostic, testing and information system VAS 5051.
–  Read out and erase all fault memory that may have been registered as a result of the fitting.
–  Take vehicle for a test drive.
–  A check of the vehicle system test should be carried out immediately afterwards. Possible error messages must be deleted.
  Note
If the fault memory has been deleted, the readiness code must be generated: → Vehicle diagnostic, testing and information system VAS 5051„Guided Fault Finding“.
Tightening torques:
  A10-0129
Bolt union Tightening torque
Bolts, nutsM 610 Nm
 M 715 Nm
 M 825 Nm
 M10:40 Nm
 M1260 Nm


Supporting engine in installation position > < Attaching engine to repair stand