seat Workshop Repair Guides

SEAT Workshop Service and Repair Manuals

Notched belt: fitting > < Removing, installing and tensioning toothed belts
Notched belt: removing
–  Remove engine cover .
–  Remove poly-V belt and remove locking pin -T10060 A-.
–  Remove the top hose from the expansion tank for the coolant.
–  Loosen the expansion tank and place to one side.
–  Remove upper notched belt guard.
   
–  Position the support bracket -10 - 222 A- with adapter -10 - 222 A /1- as show and support the engine in the fitting position.
The following must be taken into account:
l  The spindle -arrows- point to the back.
–  Remove the soundproofing → Bodywork, exterior fitting work; Rep. gr.50.
  E15-10093
–  Remove vibration damper/belt pulley.
–  Remove the toothed belt guard centre and lower parts.
  A13-0009
–  Remove the bottom bolt -1- from the engine bracket.
  A13-0505
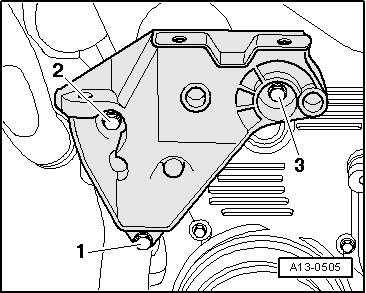
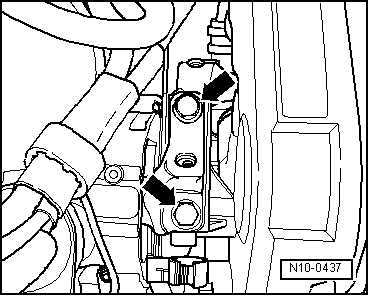
–  Unscrew the fixing bolts on the subframe / engine support -arrows- and completely remove the bearing.
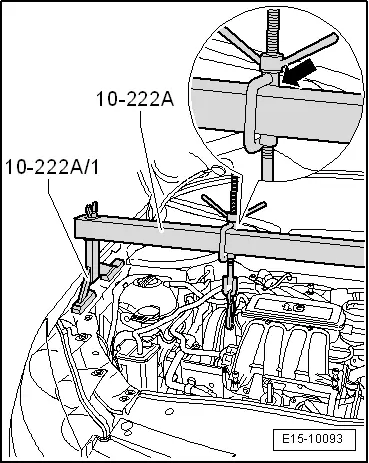
  Caution
When raising the engine with the support tool -10-222A-, prevent the components / hoses from being damage, excessively stretched or pulled off.
  N10-0437
–  Raise engine using the support tool -10-222A- until the two upper bolts -3 and 2- of the engine mounting can be loosened and removed.
–  Remove engine bracket upwards.
  A13-0505
–  Turn the crankshaft until the camshaft sprocket has reached the marking „TDC“ cyl. 1. The mark on the camshaft sprocket must be aligned with the arrow on the notched belt guard.
–  Mark the toothed belt D.O.R.
–  Loosen the tension roller and remove the notched belt.
–  Turn crankshaft back slightly.
  A13-0691

Notched belt: fitting > < Removing, installing and tensioning toothed belts