
Leon Mk1
|
|
|
|
|
|
|
|
|
|
|
 Note
Note |
|
|
|
 WARNING
|
|
Note
|
|
Note
|
|
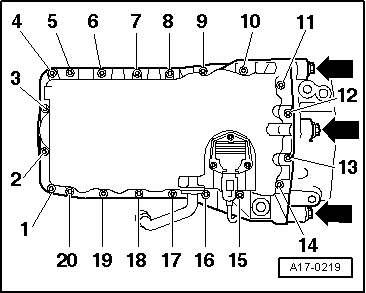
| Component | Nm | |
| Oil pan to cylinder block | 15 | |
| Sump to gearbox | 40 | |
| Oil drain plug | 30 | |