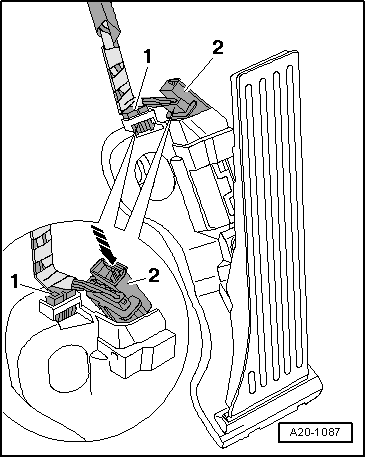
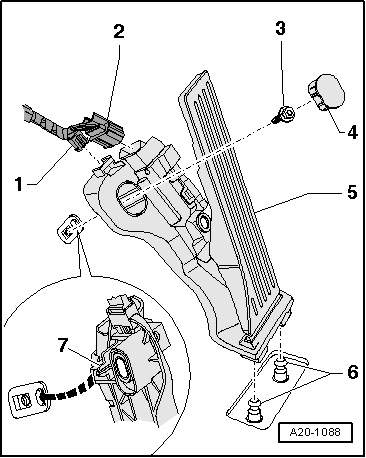
seat Workshop Repair Guides

SEAT Workshop Service and Repair Manuals

Fuel supply system > < Valve gear - Components overview
Accelerator pedal module with accelerator pedal position senderG79 and accelerator pedal position sender 2G185: removing and fitting
Accelerator pedal module with accelerator pedal position sender -G79- and accelerator pedal position sender 2 -G185-: removing and fitting
t  Removing → Anchor
t  Fitting → Anchor
t  Tightening torque → Anchor
Consult the equivalence table for tools and equipment according to applicability among Seat / VW / Audi / Skoda → Chapter.
Special tools and workshop equipment required
   
t  Pressure tool -T10238- (left guide vehicles), see equivalent → Anchor
  W00-10110
t  Pressure tool -T10240- (right guide vehicles), see equivalent → Anchor
Removing
  W00-10108
–  Remove the steering column cover -arrows-.
–  Lift the cover using a screwdriver as a lever.
–  Loosen the bolt.
  A20-1085
–  Insert the pressure tool -T10238- (left-hand drive vehicles) or the pressure tool -T10240- (right-hand drive vehicles) in the space on the accelerator pedal module, as shown in the diagram.
–  Remove the accelerator pedal module from the fitting.
  N20-10056
–  Disconnect the electrical connection -2-; to do this, press the release tab in all the way -arrow-.
–  Remove the cable guide -1- from the accelerator pedal module, if there is one.
Fitting
Installation is carried out in the reverse sequence; note the following:
  A20-1087
–  Attach cable guide clip -1- and electrical connector -2- to accelerator pedal module -5-.
l  The connector should snap into place.
–  Insert the accelerator pedal module into the attachment pins -6-.
–  Fit the centre fastener -7- in the hole on the vehicle floor.
–  Secure the accelerator pedal module using the bolt -3- and fit the cover -4-.
–  Remove the steering column cover.
Tightening torque
  A20-1088
ComponentNm
Accelerator pedal module to bodywork9


Fuel supply system > < Valve gear - Components overview