seat Workshop Repair Guides

SEAT Workshop Service and Repair Manuals

Engine cooling > < Disassemble and assemble the greasing system components
Work procedure
Work procedure
–  Drain the motor oil.
–  Disassemble the ribbed trapezoidal belt protection and the cable conduit in the sump.
–  Unscrew the exhaust pipe in the front part of the elbow joint.
–  Remove the articulated rod from the right side of the transmission. → Running gear; Rep. Gr.40
–  Unscrew the sealed sump with a liquid lock.
–  Remove the sump. If necessary, tap lightly with a rubber hammer to separate the sump.
–  Eliminate the remains of waterproofing agent from the cylinder block with a flat scraper.
   
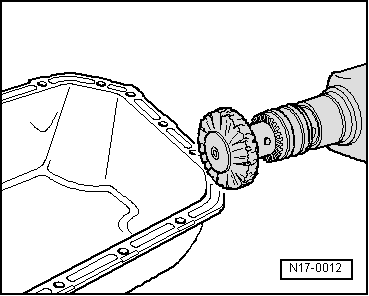
–  Eliminate the remains of waterproofing agent from the sump with a rotating brush, i.e. a hand drill with the plastic brush attachment (wear safety glasses).
–  Clean the hermetic surfaces. They should be free of oils and greases.
  Note!
t  Remember the expiration date of the waterproofing agent.
t  The sump must be assembled 5 minutes after applying the silicon waterproofing.
t  
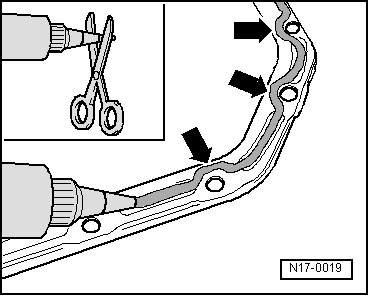
To install the sump in a safe and easy way, introduce as guides some male screw threads in the flange points of the cylinder block M6.
  N17-0012
–  Cut the nozzle of the forward mark hose (Ø nozzle approx. 3 mm).
–  As indicated, apply silicon waterproofing agent in the hermetic surface of the sump. The waterproofing cord:
t  Should have a thickness of 3...4 mm
t  Pass through the interior side in the area of the bot holes -arrows-
  Note!
The waterproofing cord should not be thicker to prevent the excess of waterproofing agent from entering the sump and stopping up the cribble of the oil vacuuming tube.
–  Immediately install the sump and lightly tighten the bolts.
–  Tighten the sump bolts 15 Nm.
  Note!
After the sump is assembled, the waterproofing must be allowed to dry for 30 minutes. Only after this time has passed can the oil be refilled.
  N17-0019

Engine cooling > < Disassemble and assemble the greasing system components