seat Workshop Repair Guides

SEAT Workshop Service and Repair Manuals

Engine cylinder head, valve gear > < Removing and installing cylinder block, sealing flange and flywheel/drive plate
Test sequence
Test sequence
   
–  Remove cover above camshaft housing -arrows-.
–  Remove air filter together with air intake connecting piece: → Chapter
–  Remove upper part of toothed belt guard.
The engine must be lowered slightly as follows to enable the crankshaft sprocket to be removed:
  E15-0065
–  Fit support -U-30025B- as shown.
–  Gently lower engine into support -U-30025B-.
  E13-0109
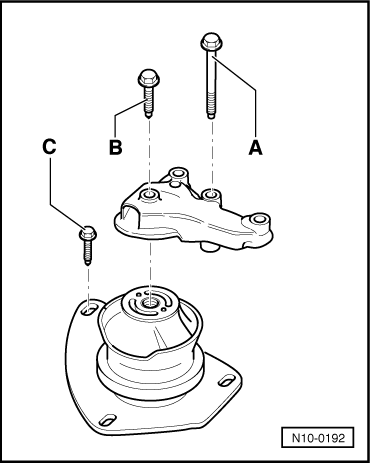
–  Remove securing bolts -A- and -B- and remove complete assembly mounting.
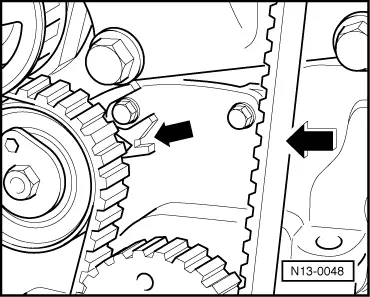
–  Remove upper securing bolt from lower toothed belt guard situated under console.
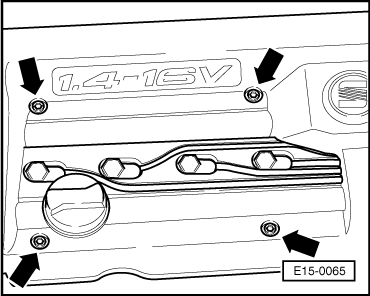
–  Remove console from cylinder head.
–  Remove right insulation tray.
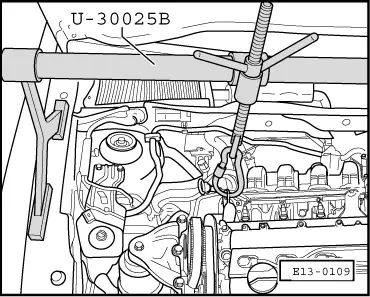
–  Lower engine until the pulley securing bolt is accessible.
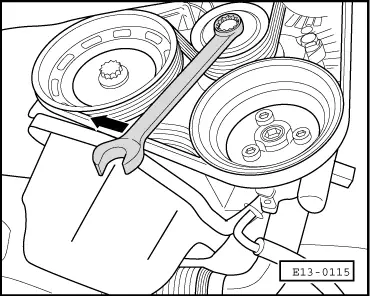
–  Mark direction of rotation of ribbed belt.
  N10-0192
–  Using a spanner on the securing bolt swivel tensioning roller in direction of arrow.
–  Removing ribbed-belt.
  E13-0115
–  Loosen pulley and toothed belt sprocket securing bolt. Support pulley with counter support -T20018A-
–  Remove pulley. Refit securing bolt with two washers and tighten to secure toothed belt sprocket.
–  Now turn crankshaft twice in direction of engine rotation until it is again at TDC No. 1 cylinder.
–  Remove lower toothed belt guard.
  E13-0110
–  Note the position of the tensioning roller indicator -arrow-. Press the toothed belt firmly with thumb. The indicator should move.
–  Release tension on toothed belt.
–  Turn crankshaft twice in direction of engine rotation.
–  Then check the position of the indicator. It should have returned to its original position.
If tensioning roller does not return to initial position:
–  Replace tensioning roller.
  N13-0048

Engine cylinder head, valve gear > < Removing and installing cylinder block, sealing flange and flywheel/drive plate