seat Workshop Repair Guides

SEAT Workshop Service and Repair Manuals

Rear section of the cardan shaft: Separating and connecting > < Assembly overview - propshaft
Front section of the cardan shaft: Separating and connecting
Detaching → Anchor.
Connecting → Anchor.
  Note
t  If possible, use a twin pillar lifting platform when working on the propshaft.
t  Before removing, mark the positions of all parts in relation to each other. Reinstall in the same position to avoid excessive imbalance, resulting in bearing damage and rumbling noise.
t  Do not bend propshaft, store and transport extended only.
t  Always support the propshaft during removal; it must not be allowed to »hang down« from one of the joints.
t  Always keep the propshaft horizontal while pulling it off or fitting it on the joint flange.
Consult the equivalence table for tools and equipment according to applicability among Seat / VW / Audi / Skoda → Chapter.
   
Special tools and workshop equipment required
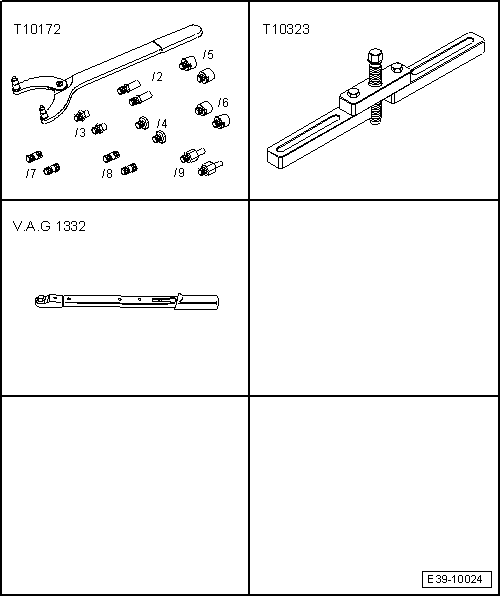
t  Support equipment -T10172-
t  Support bridge -T10323-
t  Torque wrench -V.A.G 1332-
t 

Detaching
–  Remove noise insulation → General body repairs, exterior; Rep. gr.50.
   
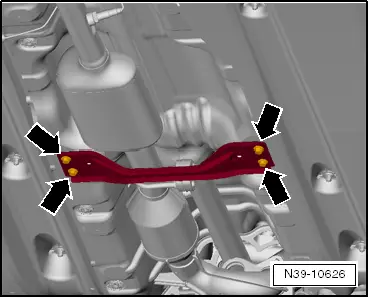
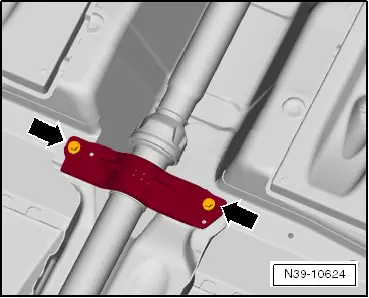
–  Unbolt and remove cross piece -arrows-.
  Note
The front intermediate bearing is also unbolted at the same time as the bolts of the cross piece are removed.
  N39-10626
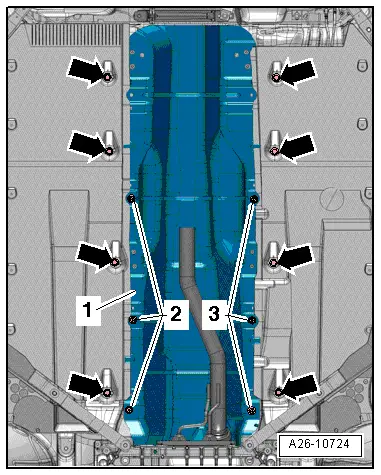
–  Unscrew lock washers -2- and -3-.
–  Unscrew the underbody from the inside -arrows- and lower until the heat shield -1- can be removed → Body, front; Rep. gr.50.
  A26-10724
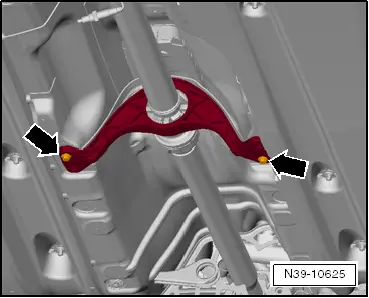
–  To continue the work of removal, first attach the propshaft at the intermediate bearing with 2 bolts -arrows-.
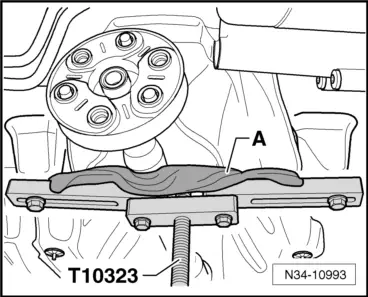
–  Secure support bridge -T10323- via inner rear threaded holes for the subframe. Use the subframe securing bolts for this purpose.
  N39-10625
To prevent later noise due to imbalance:
–  Mark position of propshaft with flexible coupling relative to bevel box flange with paint.
  Note
A second mechanic is required for the further removal of the propshaft.
  N01-0453
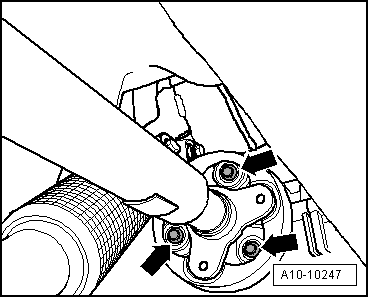
–  Remove the propshaft bolts -arrows-.
  A10-10247
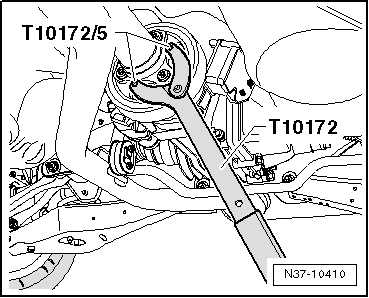
–  Counterhold at rear final drive when loosening or tightening propshaft.
–  Unbolt propshaft from bevel box.
  N37-10410
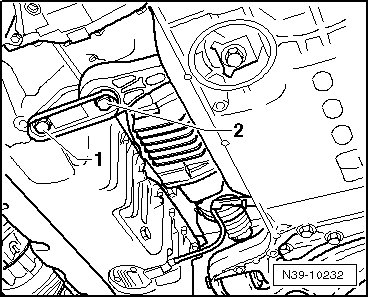
–  Remove bolts -1- and -2- for pendulum support.
  N39-10232
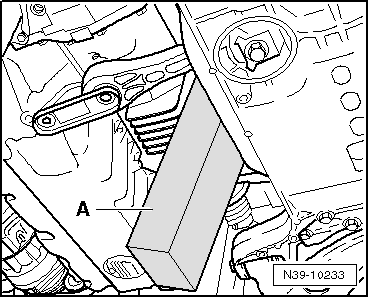
–  Press »engine and gearbox« forwards and secure in position with an appropriate piece of wood -A-.
  N39-10233
–  Lie a cloth -A- on the support bridge -T10323-, so as not to damage the propshaft paint.
  N34-10993
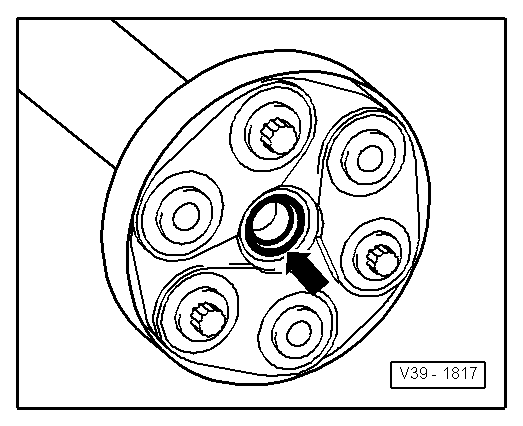
–  When pulling off or pushing on propshaft, always ensure that sleeve -arrow- is not damaged.
  WARNING
To prevent damage to the protective boots in the centre bearings, remove, store and install the propshaft with the joint as straight as possible.
  V39-1817
–  Unscrew the rear centre bearing -arrows- and the two bolts of the front centre bearing.
Connecting
Install in reverse order, observing following:
–  Install all parts which were marked in relation to each other in their original positions.
–  Tighten propshaft bolts. Specified torques → Chapter
  N39-10624
–  Bolt on pendulum support using »new« bolts. Torque settings → Running gear, axles, steering; Rep. gr.40.
–  Install tunnel cross piece → General body repairs, exterior; Rep. gr.50.
–  Install noise insulation → General body repairs, exterior; Rep. gr.50.
  N39-10232

Rear section of the cardan shaft: Separating and connecting > < Assembly overview - propshaft