seat Workshop Repair Guides

SEAT Workshop Service and Repair Manuals

Removing and installing flexible coupling (rear) > < Front section of the cardan shaft: Separating and connecting
Rear section of the cardan shaft: Separating and connecting
  Note
t  Repairs on the propshaft should be carried out on a two pillar hoist.
t  In order to achieve the quietest possible running, only the complete propshaft is balanced during manufacture. The balancing of the complete propshaft or the individual propshaft tubes cannot be carried out with workshop equipment. Therefore, in the event of damage to the front or rear propshaft tube, the entire propshaft must always be renewed.
t  Do not bend propshaft, store and transport extended only.
t  Before removing, mark the position of each part with respect to the other parts. The parts must be reassembled in the same position. If not, the system will be excessively unbalanced. This can damage the assignments and cause noise.
Detaching → Anchor.
Connecting → Anchor.
Consult the equivalence table for tools and equipment according to applicability among Seat / VW / Audi / Skoda → Chapter.
Special tools and workshop equipment required
   
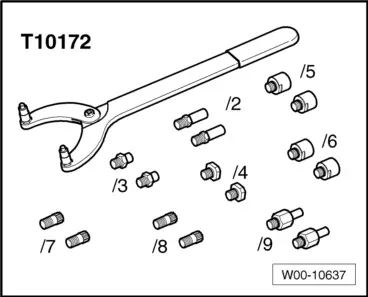
t  Support equipment -T10172-
  W00-10637
t  Torque wrench -V.A.G 1332-
Detaching
  Note
t  Repairs on the propshaft should be carried out on a two pillar hoist.
t  Before removing, mark the positions of all parts in relation to each other. Reinstall in the same position to avoid excessive imbalance, resulting in bearing damage and rumbling noise.
t  Do not bend propshaft, store and transport extended only.
  W00-0428
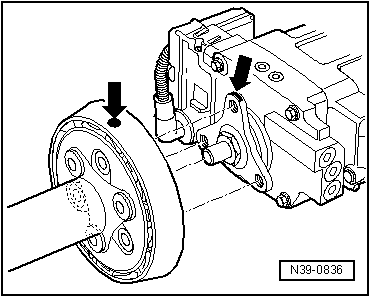
–  Before removal, check if there are coloured marks on flexible coupling and on flange of rear final drive -arrows-. If not, mark positions of flexible coupling and propshaft flange of rear final drive relative to each other -arrows-.
  N39-0836
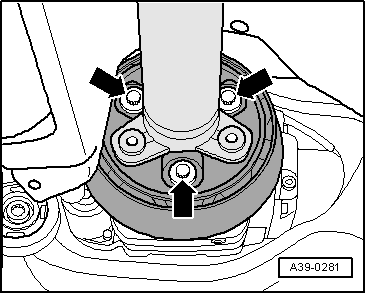
–  Unbolt flexible coupling and vibration damper from rear final drive -arrows-.
  A39-0281
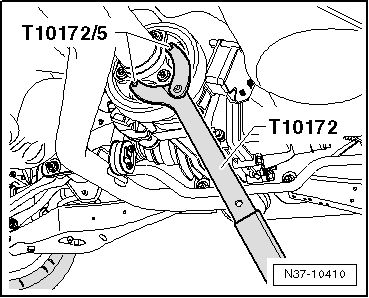
–  Counterhold on rear final drive when loosening or tightening propshaft bolts.
  N37-10410
–  Loosen bolts of cross piece -arrows-.
  Note
The front intermediate bearing is also loosened at the same time as the bolts of the cross piece are loosened.
  N39-10626
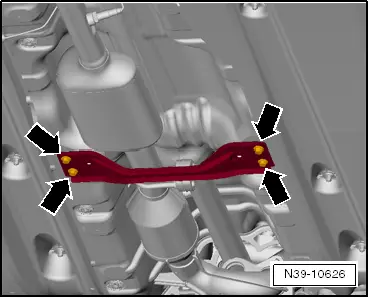
–  Unbolt rear intermediate bearing -arrows-.
–  Pull off rear propshaft tube from propshaft flange on final drive.
  Note
  N39-10624
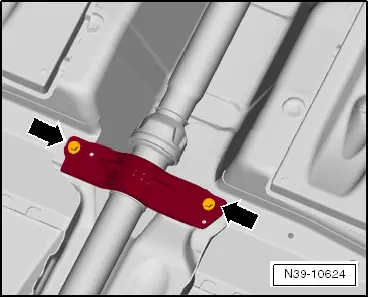
t  Do not tilt propshaft when removing; pull off centring pin horizontally. Make sure that the seal in the centring sleeve -arrow- does not become damaged.
t  The flexible disk and vibration damper cannot be separated.
Connecting
Install in reverse order, observing following:
  Note
  V39-1817
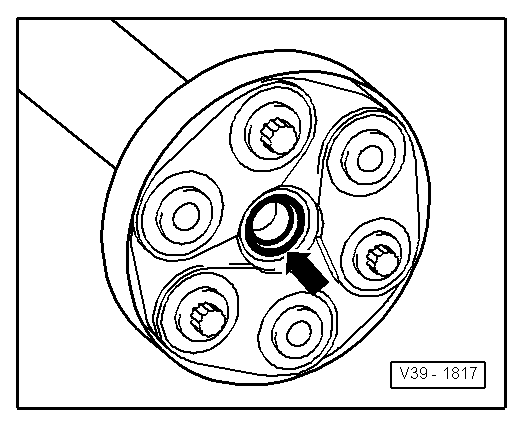
t  The seals in flanges of the propshaft -arrow- must not be damaged when removing and installing.
t  Renew propshaft if damaged.
t  Do not tilt rear propshaft tube; push on horizontally onto centring pin.
t  All parts of the propshaft marked in relation to each other must be reinstalled in the same position.
t  Specified torques → Chapter
  V39-1366
Installation position of flexible coupling with vibration damper:
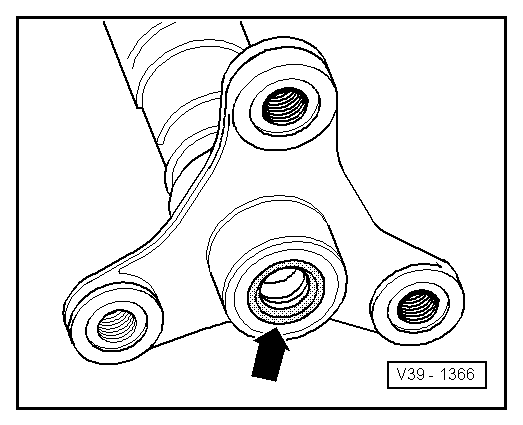
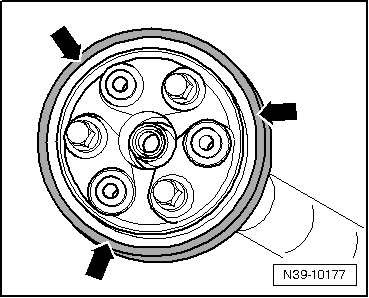
t  The rear final group flange as well as the flange of the cardan shaft have 3 bushings -arrows- that protrude and are inserted into the respective boreholes of the flexible disc.
  N39-10177
–  Attach propshaft to propshaft flange of rear final drive so that marks -arrows- align.
Install the centre bearing free of stress.
–  Align intermediate bearings in their elongated holes so that neither propshaft nor intermediate bearings are under tension.
–  Do not tighten intermediate bearings until propshaft has been fitted.
–  Tighten propshaft bolts. Specified torques → Chapter
  N39-0836

Removing and installing flexible coupling (rear) > < Front section of the cardan shaft: Separating and connecting