seat Workshop Repair Guides

SEAT Workshop Service and Repair Manuals

Cardan shaft complete: Removing and installing > < Rear section of the cardan shaft: Separating and connecting
Removing and installing flexible coupling (rear)
Consult the equivalence table for tools and equipment according to applicability among Seat / VW / Audi / Skoda → Chapter.
Special tools and workshop equipment required
   
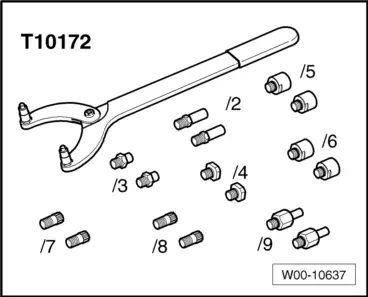
t  Support equipment -T10172-
  W00-10637
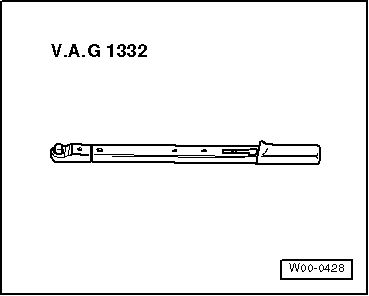
t  Torque wrench -V.A.G 1332-
Detaching
  Note
t  Repairs on the propshaft should be carried out on a two pillar hoist.
t  Before removing, mark the positions of all parts in relation to each other. Reinstall in the same position to avoid excessive imbalance, resulting in bearing damage and rumbling noise.
t  Do not bend propshaft, store and transport extended only.
  W00-0428
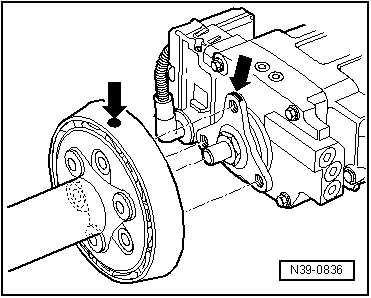
–  Before removal, check if there are coloured marks on flexible coupling and on flange of rear final drive -arrows-. If not, mark positions of flexible coupling and propshaft flange of rear final drive relative to each other -arrows-.
  N39-0836
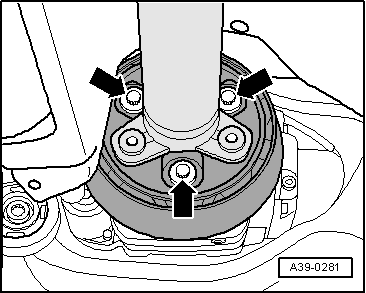
–  Unbolt flexible coupling and vibration damper from rear final drive -arrows-.
  A39-0281
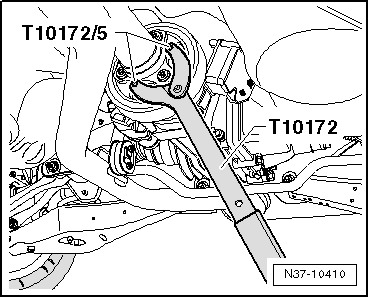
–  Counterhold on rear final drive when loosening or tightening propshaft bolts.
  N37-10410
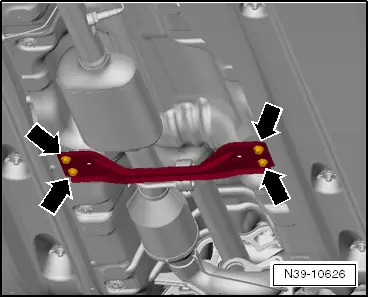
–  Loosen bolts of cross piece -arrows-.
  Note
The front intermediate bearing is also loosened at the same time as the bolts of the cross piece are loosened.
  N39-10626
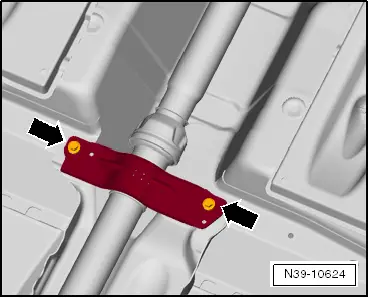
–  Unbolt rear intermediate bearing -arrows-.
–  Pull off rear propshaft tube from propshaft flange on final drive.
  Note
  N39-10624
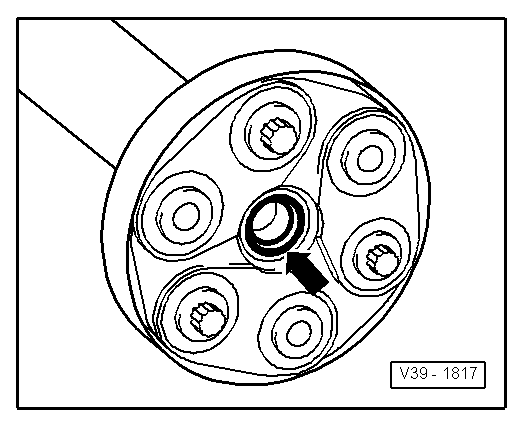
t  Do not tilt propshaft when removing; pull off centring pin horizontally. Make sure that the seal in the centring sleeve -arrow- does not become damaged.
t  The flexible disk and vibration damper cannot be separated.
  V39-1817
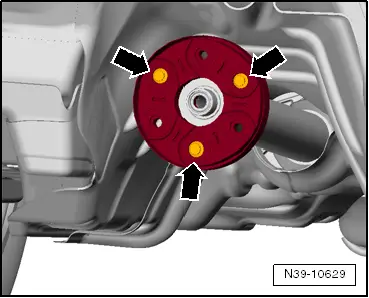
Unbolt rear flexible coupling and vibration damper from propshaft -arrows- and take out downwards.
Installing
Install in reverse order, observing following:
  Note
  N39-10629
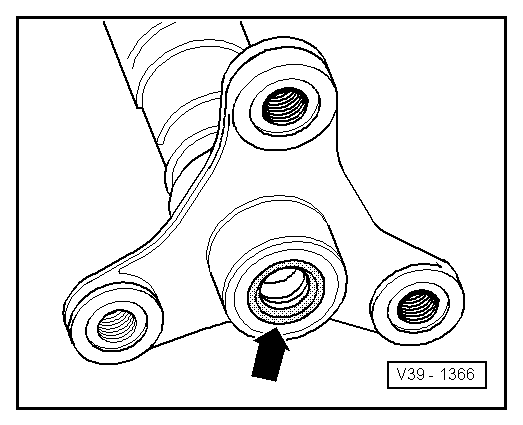
t  The seals in flanges of the propshaft -arrow- must not be damaged when removing and installing.
t  Renew propshaft if damaged.
t  Do not tilt rear propshaft tube; push on horizontally onto centring pin.
t  All parts of the propshaft marked in relation to each other must be reinstalled in the same position.
t  Specified torques → Chapter
  V39-1366
Installation position of flexible coupling with vibration damper:
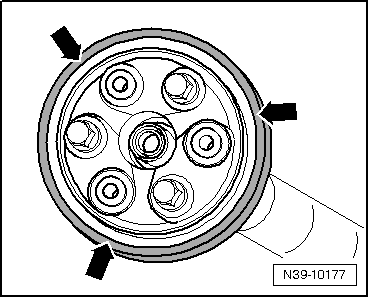
t  The shoulder on the outer circumference -arrows- must point away from the propshaft tube.
t  Three projecting sleeves each propshaft flange of rear final and propshaft flange engage in flexible coupling mounting holes.
  N39-10177
–  Attach propshaft to propshaft flange of rear final drive so that marks -arrows- align.
Install the centre bearing free of stress.
–  Align intermediate bearings in their elongated holes so that neither propshaft nor intermediate bearings are under tension.
–  Do not tighten intermediate bearings until propshaft has been fitted.
–  Tighten propshaft bolts. Specified torques → Chapter
  N39-0836

Cardan shaft complete: Removing and installing > < Rear section of the cardan shaft: Separating and connecting