| –
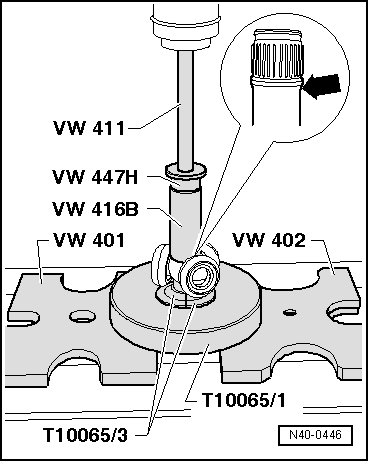
| Fit the tripod on the complete half-shaft and insert it to the limit. |
| –
| Note, the pressure should not exceed 3.0 t. |
| –
| Impregnate the driveshaft and tripod gears with lubricating paste → Parts Catalogue. |
| –
| Insert retaining ring, ensuring that it is seated correctly. |
| From 08/2004, another type of grease is used to lubricate tripod type joints. It cannot be mixed with that used previously. Therefore, when carrying out repair work, the tripod type articulation must be cleaned before greasing it. |
| –
| Introduce 70 grams of grease for complete half shafts, from the repair kit, in the the tripod joint. |
| –
| Slide joint body over rollers and hold. |
| –
| Press 60 grammes of drive shaft grease from repair kit into rear of triple roller joint. |
| Fit the tripod type joint |
| Driveshaft with cylindrical shape |
|
|

|