seat Workshop Repair Guides

SEAT Workshop Service and Repair Manuals

Assembly > < Complete half shaft with tripod type joint: repairs
Dismantling
Dismantling
–  Open the spring type clip.
–  Open the clip on the half shaft and push the joint dust guard out backwards.
   
–  Insert a flat blade screwdriver or similar into the cover and lift it by levering: If it cannot be released this way, try the opposite side.
  N40-0182
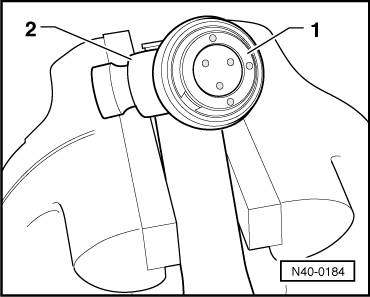
–  Mark the installation positions of parts -1- to -3-.
If these pieces are not marked and are not refitted in their original position, noises may be produced when the vehicle is back in operation.
A permanent marker should be used to mark the positions.
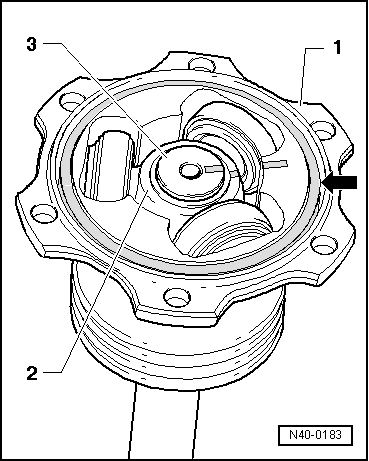
–  Remove the rubber ring -arrow- from the groove.
1 - Joint housing.
2 - Tripod.
3 - Articulated semi axle.
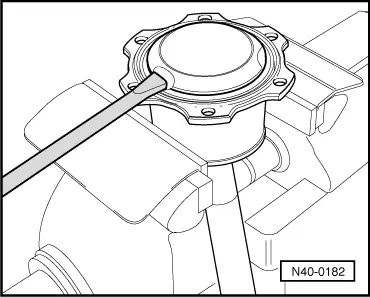
–  Support the joint housing and take out the complete half shaft from the clamp.
  WARNING
Ensure that the rollers do not fall out of the tripod onto a contaminated surface!
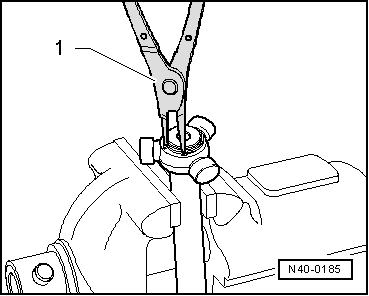
–  Secure the half shaft to the joint casing in a vertical position and, with the other hand, move the casing gently back wards.
  N40-0183
–  Mark the installation position of the rollers -1- using a permanent marker with respect to the tripod star -2-.
–  Remove the rollers -1- and secure them on a clean surface.
  N40-0184
–  Remove the securing ring.
1 - Pliers (current)
–  Secure the complete half shaft on the vice.
  N40-0185
–  Extract the tripod star from the articulated semi axle using the extractor -U-10087A-.
–  Extract the joint casing along with its dust guard from the half shaft.
–  Clean the half shaft and the casing.
  E40-0021

Assembly > < Complete half shaft with tripod type joint: repairs