seat Workshop Repair Guides

SEAT Workshop Service and Repair Manuals

Removing and installing drive shafts > < Removing and installing suspension strut
Repairing suspension strut
   
Repairing suspension strut
Special tools and workshop equipment required
t  Torque wrench -V.A.G 1332-
t  Spring compressor -V.A.G 1752/1-
t  Spring retainer -V.A.G 1752/5-
t  Strut support clamp -V.A.G 1752/20-
t  Shock absorber set -T10001-
t  Commercially available ratchet

Carry out the following work:
–  Remove coil spring strut → Chapter.
Removing coil spring
   
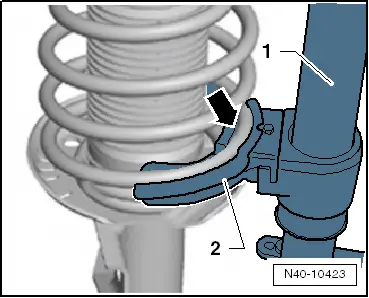
–  Clamp suspension strut support clamp -V.A.G 1752/20--4- in a vice.
–  Clamp suspension strut in suspension strut support clamp -V.A.G 1752/20--4-.
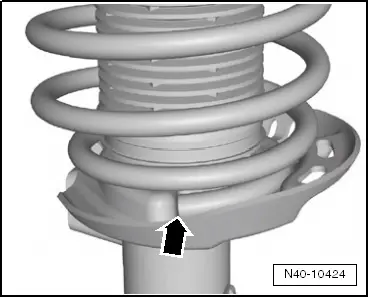
–  Pre-tension coil spring with spring compressor -V.A.G 1752/1- until deep groove ball thrust bearing is free at top.
1 - Torque wrench -V.A.G 1332-
2 - Socket and key -T10001/8-
3 - Spring compressor -V.A.G 1752/1-
4 - Strut support clamp -V.A.G 1752/20-
5 - Spring retainer -V.A.G 1752/4-
6 - Socket and key -T10001/5-
7 - Ratchet handle -T10001/11-
  WARNING
First compress spring far enough to ensure that upper spring plate is free.
  N40-10431
–  Ensure that coil spring is correctly seated in spring retainer -V.A.G 1752/4--arrow-.
–  Unscrew hexagon nut from piston rod.
–  Take off suspension strut components and coil spring together with spring compressor -V.A.G 1752/1-.
Install coil spring.
–  Fit coil spring with spring compressor -V.A.G 1752/1- onto lower spring support.
  N40-10423
The end of the coil spring must lie against the stop -arrow-.
–  Tighten new hexagon nut on piston rod.
–  Slacken off spring compressor -V.A.G 1752/1- and detach from coil spring.
–  Install suspension strut → .
  N40-10424
Tightening torque
ComponentTightening torque
Suspension strut mounting to shock absorber
t  Use new nuts
60 Nm


Removing and installing drive shafts > < Removing and installing suspension strut