seat Workshop Repair Guides

SEAT Workshop Service and Repair Manuals

Assembly overview: Subframe (front-wheel drive) > < Rear strut: removing and fitting
Shock absorber: Removing and installing
Consult the equivalence table for tools and equipment according to applicability between Seat / VW / Audi / Skoda → Chapter.
Special tools and workshop equipment required
   
t  Spring compressor -V.A.G 1752/1-
t  Adapters -V.A.G 1752/9-
t  Spring jaw, rear axle -V.A.G 1752/16-
t  Torque wrench - V.A.G 1331-, see equivalent → Anchor.
t  Torque wrench -V.A.G 1332-, see equivalent → Anchor.
Removal:
–  Remove wheel.
–  Remove coil spring → Chapter.
  W00-0500
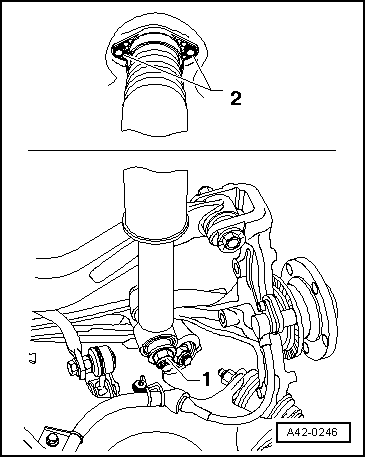
–  Unscrew nut -1- and pull out bolt (shown without splash plate)
–  Unscrew bolts -2-.
  Note
Wheel housing liner does not have to be removed.
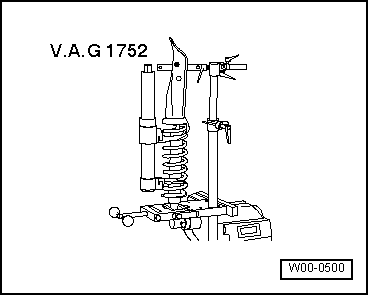
–  Remove shock absorber.
Installation
Installation is carried out in the reverse sequence; note the following:
  Note
t  Replace bolts and self-locking nuts ⇒ instructions in the exploded view from page → Chapter.
t  Bonded rubber bushes can only be turned to a limited extent. The mountings of the suspension links must therefore only be tightened when the suspension is in the unladen position → Chapter.
  A42-0246
–  Tighten upper mounting bolts -2- on shock absorber to specified tightening torque → Item.
Note position at bottom mounting → Fig..
–  Tighten bolted connection -1- on bumper on wheel bearing housing to specified tightening torque. → Item
–  Install coil spring → Chapter.
–  Mount the wheels and the tighten the wheel bolts → Running gear, axles, steering; Rep. gr. 44
  A42-0246

Assembly overview: Subframe (front-wheel drive) > < Rear strut: removing and fitting