SEAT Workshop Service and Repair Manuals
HOME
FEATURES
MENU
INDEX
ABOUT US
Electromechanical steering box, RHD vehicle >
< Steering
Leon Mk1
Running gear
Running gear, axles, steering
Steering
Electromechanical steering gear (3rd generation) in models Altea 2009, Altea XL 2009, Altea XL Freetrack 2009, Leon 2009 and To
Removal:
Removal:
–
Disconnect battery
→ Rep. gr.27
.
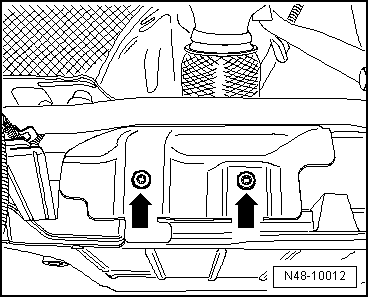
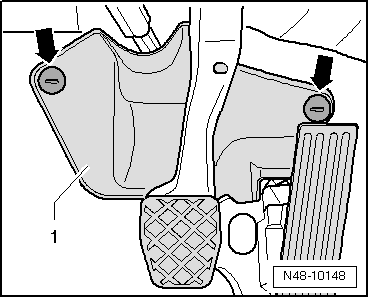
–
Unscrew nuts
-arrows-
and remove footwell trim.
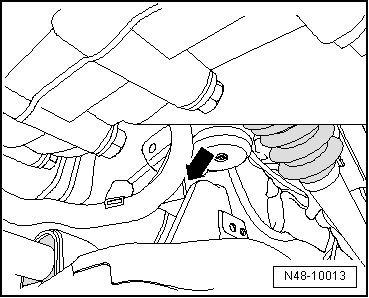
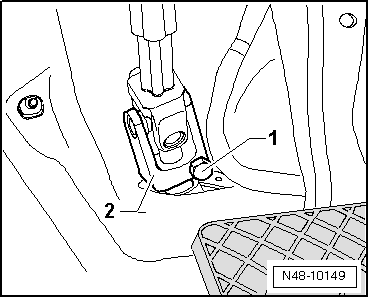
–
Undo bolt
-1-
and remove the cross member
-2-
from the steering box.
–
Remove front wheels.
–
Loosen nut on track rod ball joint but do not remove completely.
Caution
Leave nut screwed several turns onto track rod ball joint shank to protect thread.
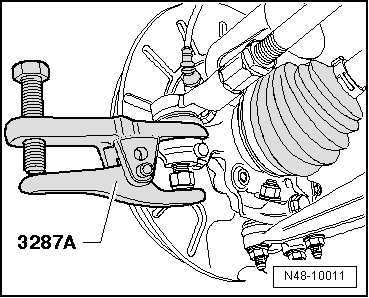
–
Release the suspension ball joint from the steering knuckle with the ball joint extractor -3287 A- and now remove the nut.
–
Remove the lower sound insulation element
→ Rep. gr.50
.
–
Detach coupling rod from the stabiliser.
–
Unscrew bolts
-14-
and detach pendulum support from gearbox.
–
Detach exhaust system bracket from subframe.
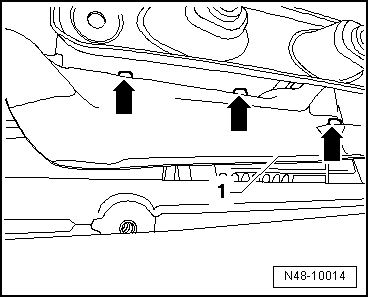
–
Remove bolts
-arrows-
from heat shield.
–
Remove heat shield from subframe.
–
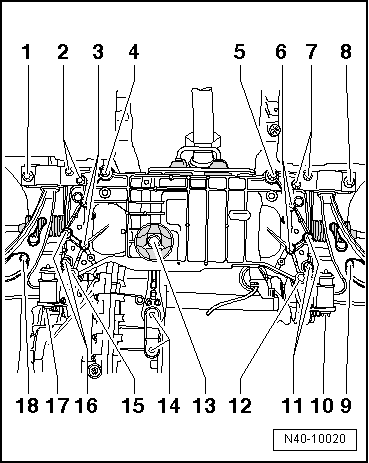
Unscrew bolts
-3, 6, 11 and 16-
of the steering box and the stabiliser bar.
–
Attach the subframe and the consoles
→ Chapter
–
Correctly position the motor driven lift - V.A.G 1383 A- with the base -T20145- and with the support tool -T20161- underneath the strut.
–
Undo bolts
-4 and 5-
and slightly lower the strut with the consoles. Pay attention to wiring.
–
Remove the heat shield
-1-
through the steering box.
–
Remove bolts
-arrows-
.
–
Detach cable guide from subframe
-arrow-
.
–
Unclip all remaining cable clips on steering box.
–
Disconnect all electrical connections on steering box.
–
Carefully lower the strut using the motor driven lift - V.A.G 1383 A-.
–
Lift the steering box to lower it from the strut.
–
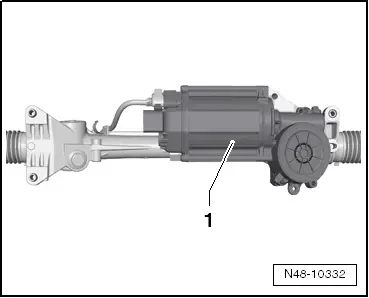
Install the steering box as shown in the diagram.
This prevents damage to control unit
-1-
.
Running gear
Running gear, axles, steering
Steering
Electromechanical steering gear (3rd generation) in models Altea 2009, Altea XL 2009, Altea XL Freetrack 2009, Leon 2009 and To
Electromechanical steering box, RHD vehicle >
< Steering
 Caution