seat Workshop Repair Guides

SEAT Workshop Service and Repair Manuals

Lights inside the passenger compartment and the boot > < Electromechanical parking brake button and auto-hold button
Removing and installing electromechanical parking brake button and auto-hold button
The electromechanical parking brake button -E538- and the auto-hold button -E540- are integrated in a button module fitted in the centre console between the front seats.
Removing:
–  Switch off ignition and all electrical loads, and pull out ignition key.
   
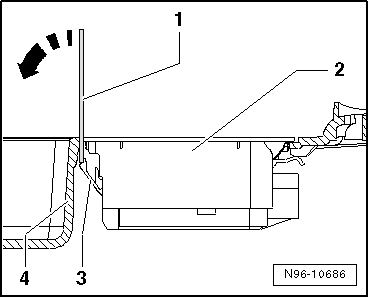
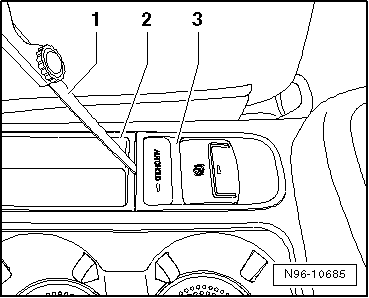
–  Carefully insert feeler gauge (0.6 mm thick) -1-, as shown in illustration, into gap between centre console -2- and button module -3-.
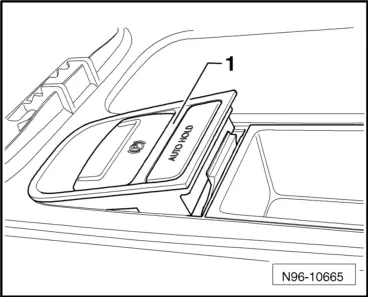
–  Hold feeler gauge vertically and slide down 10 mm between button module and centre console.
  Note
Vertical insertion of feeler gauge ensures that lock button can be reached on the outside. At 10 mm insertion depth, the tip of the feeler gauge can be felt to rest on shoulder of locking button.
  N96-10685
–  Tilt feeler gauge -1- in -direction of arrow- to operate locking button -3-. At the same time, lift up rear of button module -2- from centre console -4-.
  N96-10686
–  Remove button module -1- upwards from centre console, taking different lengths of connected wiring into consideration.
  N96-10665
–  Pull out primary locking mechanism -1-, push locking button -2- and pull off connector -3-.
–  Remove button module from vehicle.
Installing:
Installation is carried out in reverse order.
  N96-10664

Lights inside the passenger compartment and the boot > < Electromechanical parking brake button and auto-hold button