| Headlight adjustment: Countries with left-hand drive traffic for driving in countries with right-hand drive traffic |
| t
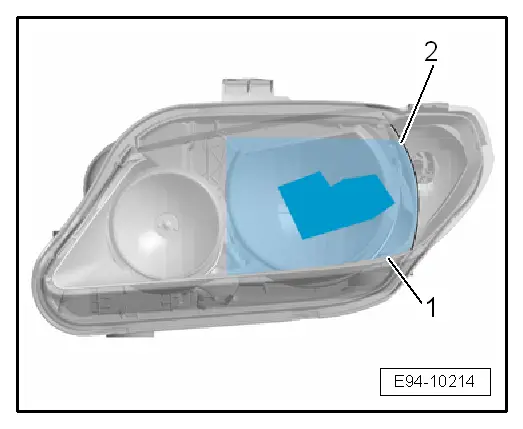
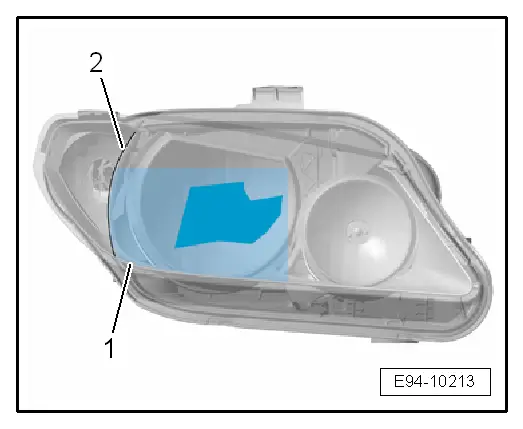
| In countries where vehicles are driven on the opposite side of the road to the vehicle's normal environment, both headlights must be partially masked by appropriately shaped opaque adhesive strips to prevent oncoming traffic from being dazzled by the asymmetric dipped beams. |
| t
| There are different masking strips available for adapting headlights for left and right-hand drive traffic (adhesive strips for headlight lens) → Parts catalogue. |

Note | t
| Download headlight templates, Exeo |
| t
| Print out appropriate file to obtain adhesive film E.1/1. |
| t
| Cut out masking foil around circumference. This serves for positioning the masked area on the headlight. |
| t
| Cut out masking area marked on adhesive foil and then glue to headlight. |
| –
| Thoroughly clean the headlight lenses on both sides of vehicle (must be clean and dry). |
|
|
|