| Removing and installing headlight with gas discharge bulb |

Caution | Before working on headlights with gas discharge bulbs, always switch off the headlights and remove the ignition key. |
| Then switch dipped beam on and off again. This will eliminate any possible residual voltage. |
|

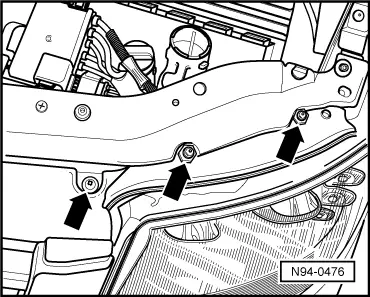
Note! | Headlight can be removed without removing bumper. |

Warning | t
| We recommend that the bumper is covered over in the area of the headlight to prevent damage to paintwork. |
| t
| If a headlight with automatic range control is removed, the basic setting of the headlight must always be performed when reinstalling → Chapter. |
|
| Special tools and workshop equipment required |
|
|
|