SEAT Workshop Service and Repair Manuals
HOME
FEATURES
MENU
INDEX
ABOUT US
Fuse holder >
< Relay carrier, fuse holder
Leon Mk1
Vehicle electrics
Electrical system
Wiring
Fuse holder:
Removing and installing the main fuse box (version 2)
Removing and installing the main fuse box (version 2)
Special tools and workshop equipment required
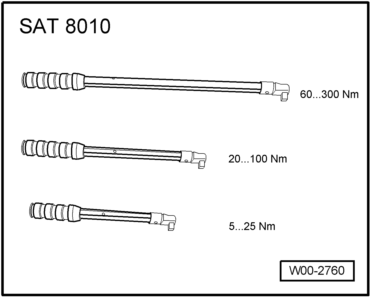
t
Torque wrenches -SAT 8010-
Removing:
–
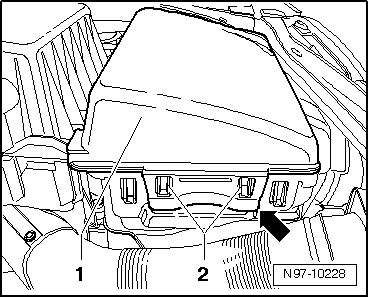
Release the cover
-2-
with the grip
-arrow-
from the lock clips
-1-
.
–
Lift the cover
-2-
of the main fuse box.
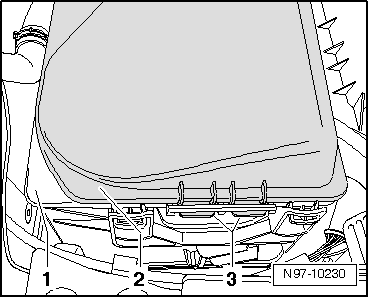
–
Remove the side tabs
-3-
of the cover
-2-
from the main fuse box
-1-
and remove cover
-2-
.
–
Disconnect ground lead and the positive terminal from the battery
→ Chapter
.
–
Unscrew the nut
-3-
of cable B+
-4-
and remove cable B+
-4-
.
–
Place the main fuse box
-2-
, without fitting it, on the battery
-1-
.
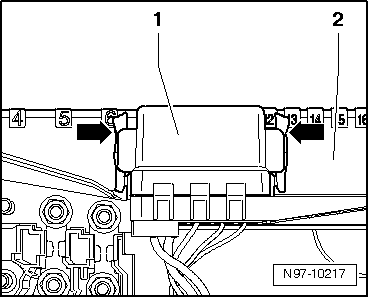
–
Unclip the tabs
-arrows-
and remove the cover
-1-
of the main fuse box
-2-
.
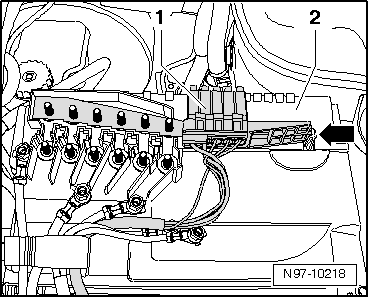
–
Unscrew the nuts
-1-
and remove the strip fuses
-2-
.
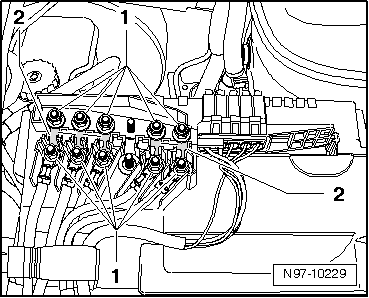
–
Unclip the tabs
-arrow-
and remove the fuse holder
-1-
of the main fuse box
-2-
.
–
Move the cable guide
-1-
in the
-direction of the arrow-
out of the main fuse box
-2-
and place it to one side as far as the cables allow.
–
Remove the main fuse box
-2-
of the battery.
Installing:
Installation is carried out in the reverse sequence; note the following:
–
Tighten nuts and bolts to the torques shown.
→ Chapter
Vehicle electrics
Electrical system
Wiring
Fuse holder:
Fuse holder >
< Relay carrier, fuse holder