SEAT Workshop Service and Repair Manuals
HOME
FEATURES
MENU
INDEX
ABOUT US
Contacts in the dash panel, 36-pin connector, inputs and outputs >
< Warning light icons in the instrument panel insert
Leon Mk1
Vehicle electrics
Vehicle electrics
Instruments, GCI / Instrument cluster / sembly_overview_dash_panel_insert/">Assembly overview - dash panel insert
Description of back of dash panel insert
Description of back of dash panel insert
Description of back of dash panel insert
Note
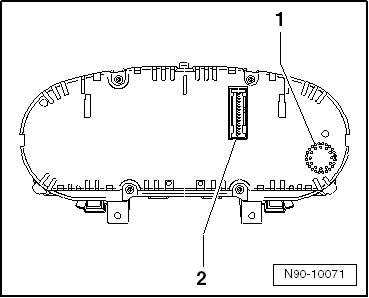
The dash panel insert must not be dismantled. If necessary, the dash panel insert is renewed as a unit. Installation position:
1 -
Warning buzzer
2 -
Connector
→ Chapter
Note
Pin assignment of connectors on dash panel insert:
→ Current flow diagrams, Electrical fault finding and Fitting locations
Vehicle electrics
Vehicle electrics
Instruments, GCI / Instrument cluster / sembly_overview_dash_panel_insert/">Assembly overview - dash panel insert
Description of back of dash panel insert
Contacts in the dash panel, 36-pin connector, inputs and outputs >
< Warning light icons in the instrument panel insert