seat Workshop Repair Guides

SEAT Workshop Service and Repair Manuals

Upholstery and padding for head rest: removal and assembly > < Cover and padding for the continuous rear seat backrest: Removing and installing.
Release lever of the rear seat backrest: Removing and installing.
Removal:
  Note
This procedure applies for both levers on the rear seat backrest.
–  Remove the rear tray.
–  Fold the rear seat backrest to the front.
   
–  Carefully detach part of glued rear velour -1- to view rear index card -2-.
  E74-0020
–  Pull release lever -1- up and out and expose shaft -2- for catch hook -3- with help of second worker.
  E74-0022
–  Release the shaft -1- using pliers -2- and press the motion clamps together -3-. The locking hooks -4- must be locked using a screwdriver.
  E74-0023
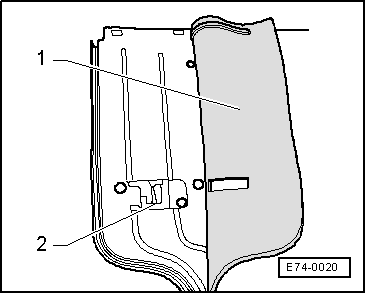
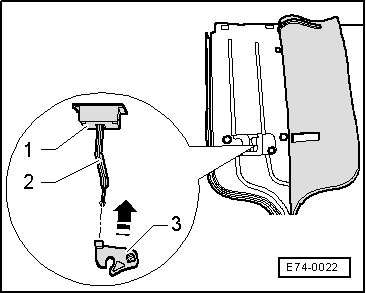
–  Detach loops for stop clips on lever frame -1-and remove unit upward -arrows-.
Installation
  Note
Before installing the lever, check the condition of the clips and replace if necessary.
Installation is carried out in the reverse order. When installing, note the following:
Use contact cement to glue on felt → Parts catalogue.
–  Clean surfaces to which contact glue is to be applied intensively with isopropyl alcohol or other standard solvent.
–  Sand any glue residues present with sandpaper.
–  Apply contact cement to velour on rear bench seat as well as frame for rear bench seat and allow to dry for 60 min.
  WARNING
Wear gloves and eye protection for safety reasons.
  E74-0024

Upholstery and padding for head rest: removal and assembly > < Cover and padding for the continuous rear seat backrest: Removing and installing.