Leon Mk2
 Note
Note
|
Note
Note
|
|
|

|
|
|
|
|
|
|
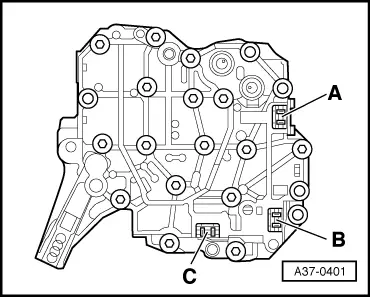
| Component | Nm |
| Automatic gearbox control unit -J217- to hydraulic control unit | 10 |
|

Note
|
Note
Note
|
|
|
|
|
|
|
|
|
|
| Component | Nm |
| Automatic gearbox control unit -J217- to hydraulic control unit | 10 |
|