
Leon Mk2
| Brake/servo pedal: removing and installing |
 Caution
|
 Note!
Note!| Before fitting, grease all support points with grease part no G 000 602. |
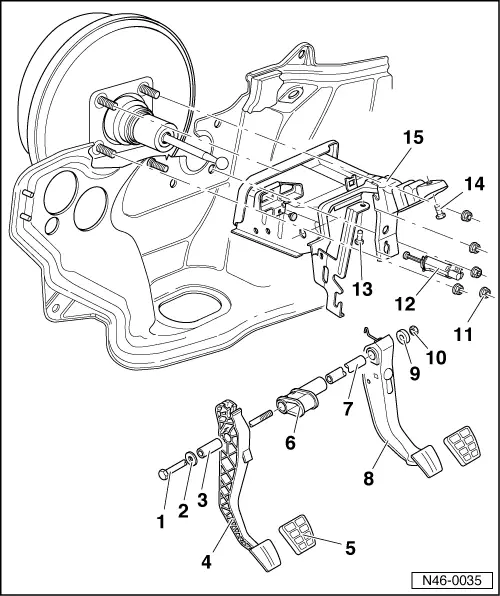
| 1 - | Brake and clutch pedal shaft |
| 2 - | Washer |
| 3 - | Bush socket for brake pedal |
| 4 - | Clutch pedal |
| q | Removing and installing: → Rep. Gr.30 |
| 5 - | Cover |
| 6 - | Bush socket |
| q | To support the enveloping tube |
| 7 - | Bush socket for brake pedal |
| 8 - | Brake pedal |
| q | Brake pedal: separate from brake servo → Chapter |
| q | Removing and installing → Chapter |
| 9 - | Washer |
| 10 - | Hexagon nut |
| q | 25 Nm |
| 11 - | Hexagon nut |
| q | 20 Nm, self-locking |
| q | Renew after removing |
| q | 4 units, to secure support block to servo brake |
| 12 - | Brake light switch -F- |
| q | Before fitting the brake light switch, the brake pedal should be engaged with the servo brake pressure-bar → Chapter, separate the brake pedal from the servo brake |
| q | Brake light switch: adjusting → Chapter |
| 13 - | Hexagon bolt |
| q | 25 Nm |
| 14 - | Hexagon bolt |
| q | 25 Nm |
| 15 - | Pedal support stand |