seat Workshop Repair Guides

SEAT Workshop Service and Repair Manuals

Swinging arm ball joint: removing and fitting|Fitting > < Swinging arm ball joint: removing and fitting
Removal
Removal
–  Raise the vehicle until the front axle is free of weight.
–  Loosen the dodecagonal nut of the half-shaft.
–  Mark the installation position of the ball joint bolts to the swinging arm.
   
–  Screw out bolts -arrows-.
  N40-0057
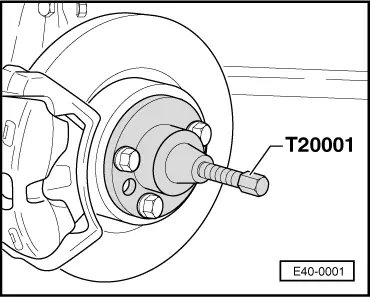
–  Pull out the articulated half shaft using the extractor-T20001- .
  Note
When the articulated half shaft is being removed, enough space must remain between the half shaft and the parts around it.
–  Remove the wheel together with the suspension strut and support it.
–  Tie the halfshaft to the chassis using a wire.
The half shaft must not be left hanging down!
Otherwise, the interior articulation will be damaged by excessive bending.
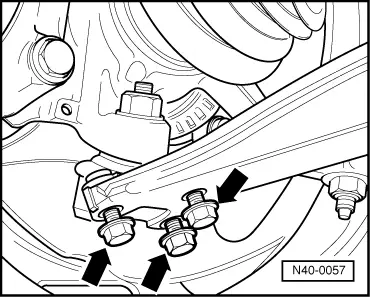
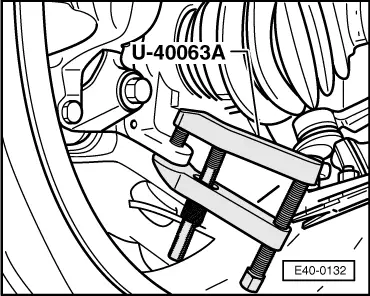
–  Loosen the ball joint nut.
  E40-0001
–  Apply the extractor-U-40063A- and remove the ball joint of the swinging arm.
  Note
t  Place beneath the engine and gearbox lift -SAT 1001-, or something similar (danger of accident if pieces fall during the removal of the ball joint).
t  Leave the nut loosely attached on the thread of the ball joint, to protect the thread.
  E40-0132

Swinging arm ball joint: removing and fitting|Fitting > < Swinging arm ball joint: removing and fitting