seat Workshop Repair Guides

SEAT Workshop Service and Repair Manuals

Wheel bearing assembly: disassembly and assembly|Fitting > < Wheel bearing assembly: disassembly and assembly
Removal
Removal
–  Raise the vehicle until the front axle is free of weight.
–  Loosen the dodecagonal nut of the half-shaft.
–  Remove wheel.
–  Remove the brake back plate with the brake caliper from the wheel bearing: →  Brake system; Rep. Gr.46
–  Attach the brake back plate with the brake caliper to the bodtwork with wire.
–  Unscrew the brake disk star bolt and remove the brake disc.
–  Remove splash plate.
–  Release the cable for the revolution sensor from the suspension strut.
–  Loosen the ball joint nut.
   
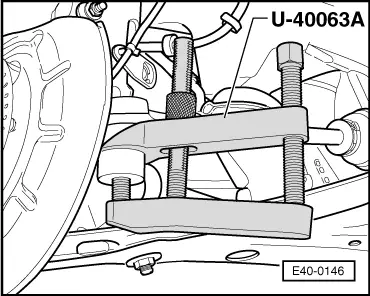
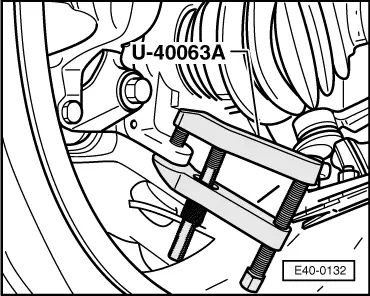
–  Apply the extractor-U-40063A- and remove the ball joint of the swinging arm.
  Note
t  Place beneath the engine and gearbox lift -SAT 1001-, or something similar (danger of accident if pieces fall during the removal of the ball joint).
t  
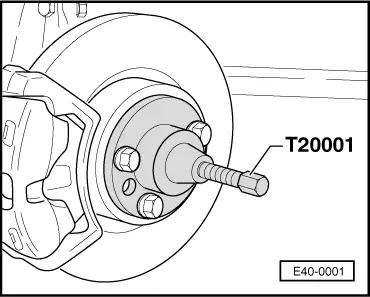
Leave the nut loosely attached on the thread of the ball joint, to protect the thread.
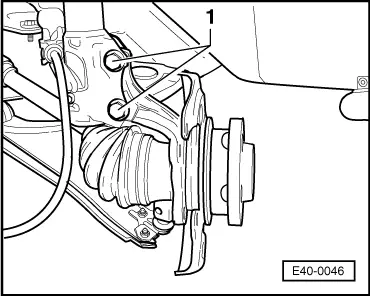
–  Remove the swinging arm with the ball joint from the wheel bearing.
  E40-0132
–  Pull out the articulated half shaft from the wheel hub using the extractor-T20001- .
  Note
When the articulated half shaft is being removed, enough space must remain between the half shaft and the parts around it.
–  Remove the suspension strut and support it.
–  Tie the halfshaft to the chassis using a wire.
The half shaft must not be left hanging down!
Otherwise, the interior articulation will be damaged by excessive bending.
–  Remove the revolution sensor.
–  Unscrew the hexagonal nut from the steering rod head.
  E40-0001
–  Take the steering rod head from the steering lever with the extractor -U-40063A-
–  Mark the fitting position of the bolts of the wheel bearing on the suspension strut
  E40-0146
–  Remove the bolts -1-.
–  Remove the wheel bearing housing .
  E40-0046

Wheel bearing assembly: disassembly and assembly|Fitting > < Wheel bearing assembly: disassembly and assembly