Loosen the hexagonal bolt of the driveshaft with the vehicle resting on its wheels (in order to avoid possible accidents).
–
Raise the vehicle until the front axle no longer bears weight.
–
Unscrew the hexagonal bolt from the driveshaft.
–
Remove the wheel and raise the vehicle.
–
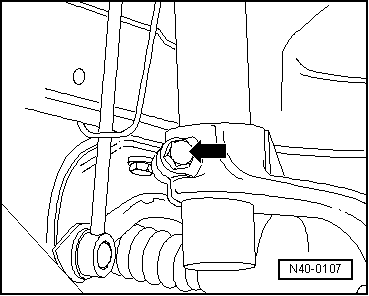
Loosen the bolt -1- of the revolution sensor.
–
Remove the ABS revolution sensor from the steering knuckle.
–
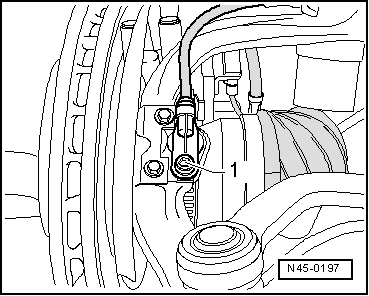
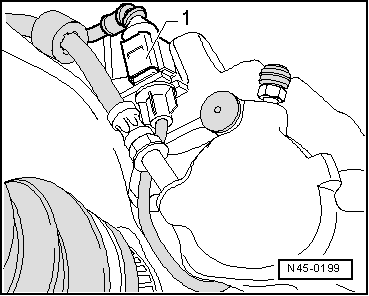
If the vehicle is equipped with a brake pad wear indicator, the connector must also be disconnected -1-.
–
Release the revolution sensor cable and the brake piping secured to the support on the steering knuckle.
–
Remove the brake support and clip, and hang on the bodywork using a wire.
–
Remove brake disc and cover plate.
–
Loosen the nut on the track rod.
–
Remove the track rod from the steering rod.
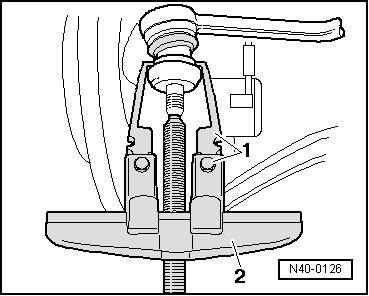
1 -
Standard hook, for example Kukko -1-90-
2 -
Standard extractor, e.g. -Kukko 20/10-
–
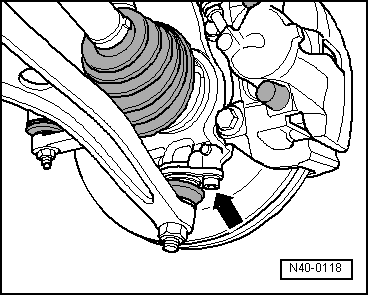
Separate the threaded steering knuckle/lower ball joint union -arrow-.
–
Pull the steering knuckle outwards.
–
Remove the driveshaft from the steering knuckle, and tie it up.
The driveshaft must not be left hanging down!
Otherwise, the inner joint will be damaged by excessive bending.
Note
Place the elevator -V.A.G 1383/A- directly under the steering knuckle. There is a risk of injury cause by the bolt which fastens the steering knuckle to the shock absorber tube coming off.
–
Loosen the bolts -arrows-.
–
Release the steering knuckle from the shock absorber tube.
 Note
Note