seat Workshop Repair Guides

SEAT Workshop Service and Repair Manuals

Installing > < Removing and installing swivel joint
Removal:
Removal:
–  Lift vehicle far enough to take weight off front axle.
–  Unscrew 12-point nut from drive shaft with socket AF 36 mm -T10125-.
  Caution
When bolt is loosened or tightened, vehicle must not be standing on its wheels.
The wheel bearing can be damaged by the weight of the vehicle if the bolt is loosened.
If a vehicle must be moved with the drive shaft removed, an outer joint must be fitted and tightened to 50 Nm.
–  Remove the front wheel. → Chapter
   
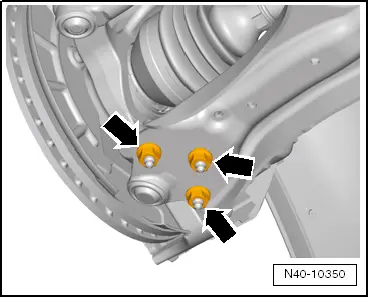
–  Extract the nuts from the suspension ball joint -arrows-.
  Note
During disassembly and assembly work, take care that the rubber bellow of the ball joint is not damaged. Where necessary, protect the rubber bellow of the ball joint against damaged.
–  Pull drive shaft slightly out of wheel hub. Pull out completely if necessary.
–  Pull swivel joint out of suspension link.
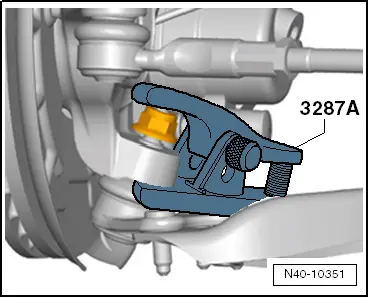
–  Loosen nut for swivel joint.
  Note
Before releasing the suspension ball joint from the steering knuckle, partially unscrew the nut to protect the thread, when the extractor is being used.
  N40-10350
–  Apply ball joint splitter -3287 A- as shown in figure and press out swivel joint.
–  Release the traverse swinging arm from the ball joint along with the front suspension assembly.
–  Tilt the traverse swinging arm as far as possible downwards, at the same time extract the ball joint from the steering knuckle.
  N40-10351

Installing > < Removing and installing swivel joint