seat Workshop Repair Guides

SEAT Workshop Service and Repair Manuals

Removing and installing wishbone and mounting bracket|Installation > < Removing and installing wishbone and mounting bracket
Removal:
Removal:
  Note
t  For those vehicles fitted with dual-function xenon headlights, before beginning the removal of elements affecting the front left hand side suspension, release the sensor for the vehicle level sender from the transversal swinging arm, depending upon versions → Electrical system; Rep. gr. 94 .
t  Perform the basic setting of the lights → Electrical system; Rep. gr. 94 → Vehicle diagnostic tester.
t  Before removing the transverse swinging arm. The unloaded vehicle height off the ground must be verified, assembly height -a- → Chapter.
t  
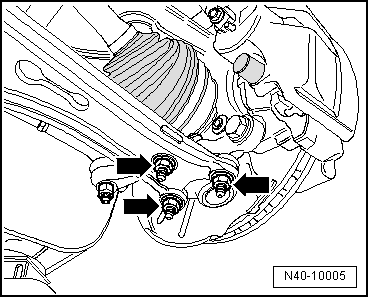
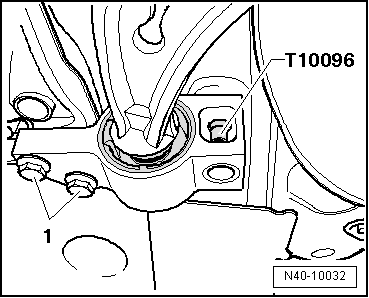
Before beginning the removal of the swinging arm, secure the installation position of the support bracket on the bodywork, → Chapter using the fastening devices -T10096- for subsequent fitting.
–  Remove wheel.
–  Remove the lower sound insulation element → Rep. gr.50 .
   
–  Unscrew nuts -arrows-.
–  Remove the transverse swinging arm from the ball joint.
–  Secure the position of the block support → Fig.
  Note
The fastening devices -T10096- should only be tightened to a maximum of 20 Nm, otherwise the thread of the fastening bolt may be damaged.
  N40-10005
–  Replace bolt -1- on the left-hand side, and -8- on the right-hand side with fastening devices -T10096- and tighten to a torque of 20 Nm.
–  Now remove bolt -10- for left side and bolt -17- for right side.
  N40-10020
–  Remove bolts -1-.
  N40-10032

Removing and installing wishbone and mounting bracket|Installation > < Removing and installing wishbone and mounting bracket