seat Workshop Repair Guides

SEAT Workshop Service and Repair Manuals

Repairing drive shaft from model year 2001 > < Checking outer constant velocity joint
Checking inner constant velocity joint
The joint should be dismantled to renew dirty grease and when checking the balls and ball tracks for wear and damage.
Removing
   
–  Swivel ball hub and ball cage.
–  Press out joint in direction of arrow
–  Press balls out of cage.
  Note
The ball hub and joint are paired. Do not interchange.
  V40-0009
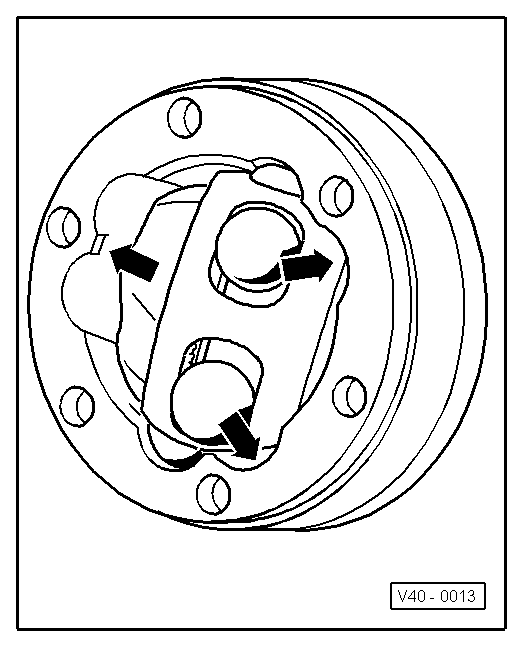
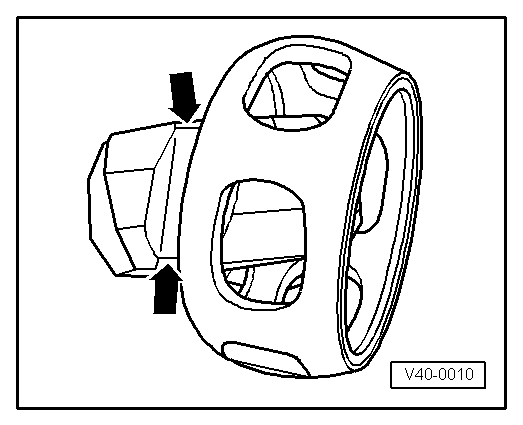
–  Tilt ball hub out of ball cage over ball track -arrows-.
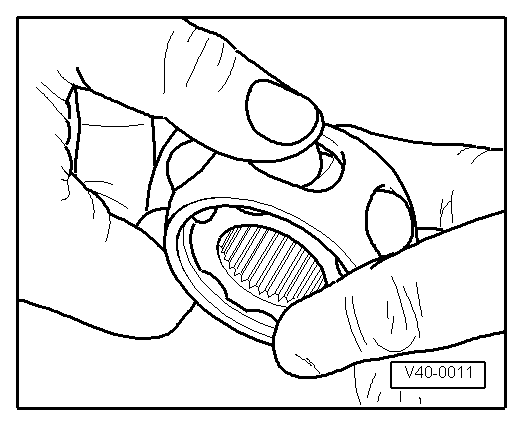
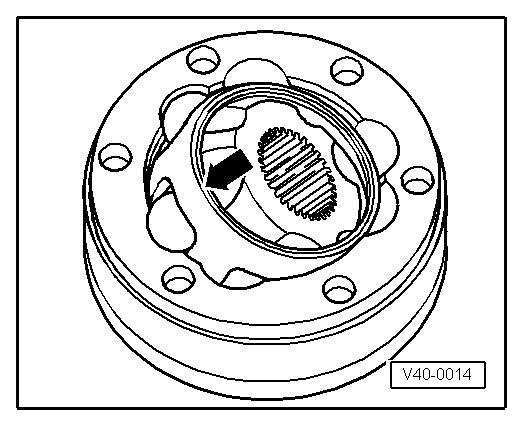
–  Check joint, ball hub, ball cage and balls for indentations (pitting) and signs of seizure.
Excessive backlash in joint will be noticed as a knock during load changes. In such cases the joint must be renewed. Polished areas and tracks from balls are not a reason for changing the joint.
Installing
  V40-0010
–  Insert ball hub over both chamfers into the ball cage. The hub can be installed in any position. Press balls into the cage.
–  Insert hub with cage and balls at right angle to the joint.
  V40-0011
t  When inserting ensure that the wide spacing -a- on joint housing is aligned with the narrow spacing -b- on the hub after swivelling in.
t  Chamfer on inner diameter of ball hub (splines) must face larger diameter of joint housing.
  V40-0012
–  Swivel in ball hub, whereby the hub must be swivelled out of the cage -arrows- far enough to allow the balls to fit into the ball tracks.
  V40-0013
–  Swivel in the hub with balls by applying firm pressure on the cage -arrow-.
Checking operation of constant velocity joint:
The constant velocity joint is correctly assembled when the ball hub can be moved backwards and forwards by hand over its entire axial movement range.
  V40-0014

Repairing drive shaft from model year 2001 > < Checking outer constant velocity joint