skoda Workshop Repair Guides

Skoda Workshop Service and Repair Manuals

Inspecting the injection-timing range > < Testing injection control
Dynamically testing and setting the commencement of injection
Always test and if necessary set the commencement of injection after replacing the toothed belt or after releasing the screws on the injection pump or the toothed belt gears.
The dynamic testing and correction of the commencement of injection is only possible in function 04 “basic setting”.
Special tools and workshop equipment required
t  Vehicle system tester -V.A.G 1552-
t  Diagnostic cable -V.A.G 1551/3-
t  Torque wrench 5...50 Nm (e.g. -V.A.G 1331-)
t  Counterholder -MP 1-216- or -T30004 -
Test condition
l  Toothed belt tension O.K.
Test sequence
–  Connect vehicle system tester - V.A.G 1552-. Leave the engine on and select the engine control unit with “Address word” 01 → Chapter.
–  Select function 04 “basic setting” and display group number 000.
   
Readout on display:
–  Observe display field 7 (coolant temperature).
   Specified value: [lt ] 73 (corresponds with 85 °C)
Only continue test when nominal value is reached.
 
System in basic setting 0            ->
43  79  0  22  19  199  73  156  131 255
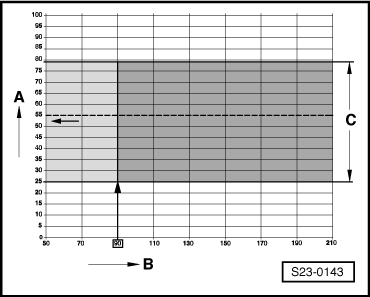
–  The commencement of injection in display field 2 is dependent on the fuel temperature in display field 9.
A - Display field 2, commencement of injection
B - Display field 9, fuel temperature
C - Nominal value range for commencement of injection
Read out examples:
Numerical value 90 in display field 9 -B- corresponds in display field 2 -A- to a numerical value of 25...78.
  Note
No setting is required if during testing the commencement of injection is in the nominal value range -C-.
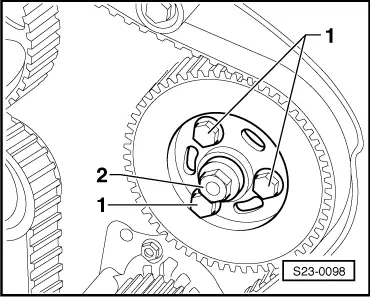
If the commencement of injection is outside the nominal value range, adjust the commencement of injection as follows:
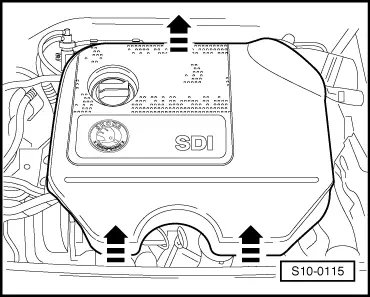
–  Switch off the ignition.
  S23-0143
–  Remove engine cover.
   To do so pull the front and rear engine cover upwards with a sudden motion.
–  Remove the top toothed belt shield.
  S10-0115
–  Release the two fixing screws -1- of the injection pump gear.
–  Hold the fixing nut -2- with a wrench to counterhold the pump shaft.
–  Release the third fixing screw -1- from the injection pump gear and slightly rotate the pump shaft:
   to the left
⇒ delayed commencement of injection
   to the right
⇒ advanced commencement of injection
  Note
The nut -2- for the hub must never be loosened. This could result in a misadjustment of the basic setting of the injection pump which cannot be corrected with workshop tools.
  S23-0098
Version -A-: Fixing bolts with relief on the thread stem and tip -arrows-
–  Tighten the new fixing screws of the injection pump gear.
   Tightening torque: 20 Nm
  Note
t  After a dynamic test of the start of pump delivery tighten the fixing bolts a further 1/4 turn (90°).
t  The fixing bolts must be used once only as they are antifatigue bolts.
  N13-0614
Version -B-: Fixing bolts without relief on the thread stem and tip
–  Tighten the old fixing screws of the injection pump gear.
   Tightening torque: 25 Nm
  Note
Do not replace the fixing bolts.
Continued for all versions:
–  Again check the commencement of injection.
If the commencement of injection is outside the nominal value:
–  Correct the position of the injection pump gear versus the injection pump shaft until the nominal value is reached.
Version -A-: Fixing bolts with relief on the thread stem and tip -arrows-
–  Tighten the new fixing screws of the injection pump gear one further 1/4 turn (90°).
Continued for all versions:
–  Select function 06 “End output” and confirm entry with Q.
–  Switch off the ignition.
–  Install top toothed belt shield and engine cover.
  N13-0614

Inspecting the injection-timing range > < Testing injection control