
Fabia Mk1
|
|
|
 Note
Note
|
|
|
|
|
|
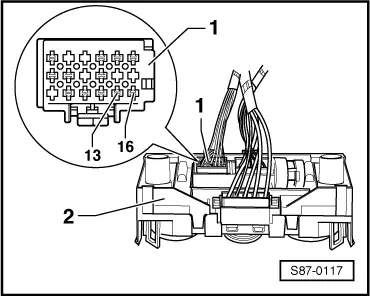
| Contact assignment | ||
| 13 | 16 | |
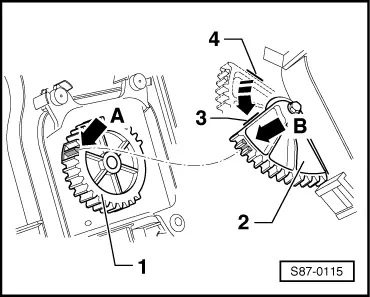
| Control motor runs in position “cold” (gear segment down) | - | + |
| Control motor runs in position “warm” (gear segment up) | + | - |
|
Note |
|
|