
Fabia Mk1
|
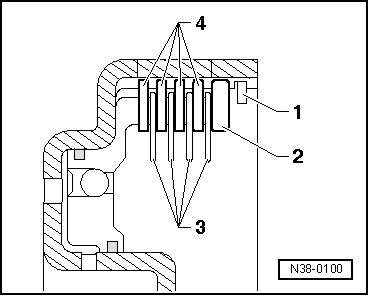
| Already when assembling, pay attention → Fig. to the number of plates and their fitting position |
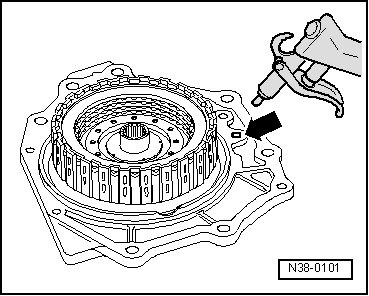
| Inspect operation of clutch → Fig. |

| 1 - | Circlip |
| q | release with a screwdriver |
| 2 - | Pressure plate |
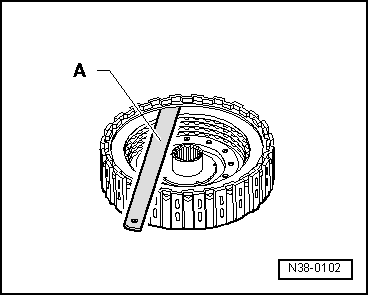
| q | installing → Fig. |
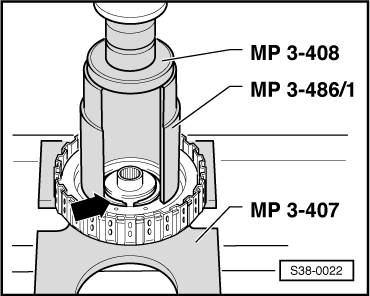
| q | Determine thickness → Fig. |
| 3 - | Inner plate |
| q | installing → Fig. |
| q | Piece number → Chapter |
| 4 - | Outer plate |
| q | installing → Fig. |
| q | Piece number → Chapter |
| 5 - | Circlip |
| q | removing and installing → Fig. |
| 6 - | Spring support plate |
| q | with springs |
| 7 - | Gasket ring |
| q | always replace |
| 8 - | Gasket ring |
| q | always replace |
| 9 - | Piston |
| q | differs depending on the engine version |
| q | assigned to gearbox identification characters as a spare part |
| q | moisten sealing lips with ATF before inserting |
| q | turn piston slightly when installing |
| q | after installing the piston must turn in the clutch bell |
| 10 - | Clutch bell |
|
|
|

|
|
|
|
|
| Component | Fitting dimension | Wear limit |
| Clutch -K3- | 1.8…2.2 mm | 2.4 mm |
|