skoda Workshop Repair Guides

Skoda Workshop Service and Repair Manuals

Disassembling and assembling the gearbox for gearbox as of gearbox manufacturing date 07.03 > < Disassembling gearbox
Assembling gearbox
Assembling gearbox
   
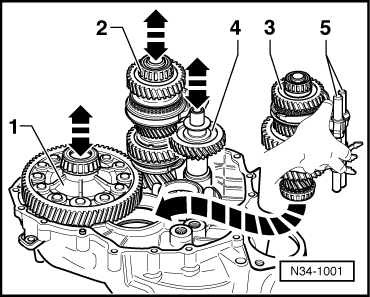
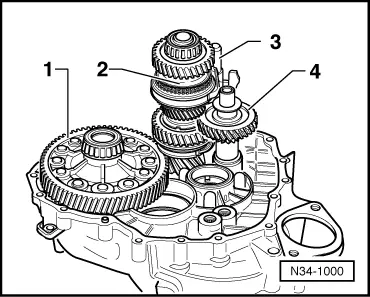
–  Insert the differential -1-.
–  Insert output shaft 5th/6th and reverse gear output -2- together with reverse gear shift fork, 5th/6th gear -3- and reverse shaft -4-.
  N34-1000
–  As shown in the figure take the output shaft gears 1 through 4 -3- with the gear shift rods -5- in the right hand.
–  Slightly lift the differential with the left hand.
–  At the same time a 2nd mechanic lifts the output shaft 5th/6th gear and reverse gear -2- together with the reverse shaft -4-.
–  Now insert the output shaft gears 1 to 4 in the direction of the arrow.
The serration of the output shafts and final drive/differential must be in mesh.
–  Now place the shafts together with a 2nd mechanic in their bearing assembly.
  N34-1001
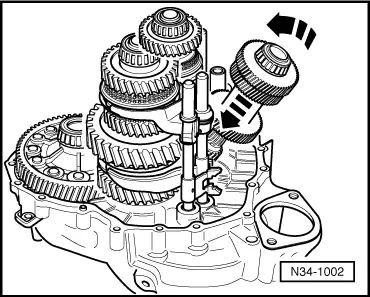
–  Position the drive shaft in the clutch housing and swivel -direction of arrow-.
  N34-1002
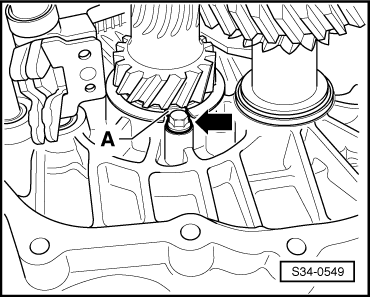
–  Position the lock washer -A- into the recess of the clutch housing (outer ring/tapered-roller bearing for drive shaft).
–  Tighten new screw to tightening torque → Chapter.
–  Fit gearbox housing.
  S34-0549
Install the gearshift shaft as follows:
–  Put the shift rods into Neutral.
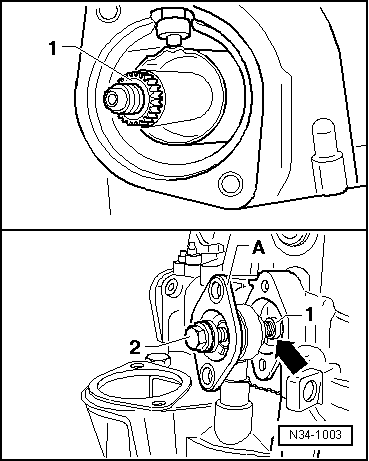
–  Insert the gearshift shaft -1-.
–  Align the gearshift shaft in such a way that the shift fingers are inserted into the shift rods → Fig..
–  To do so align the bottom bearing -arrow- of the gearshift shaft through the hole for the cap.
–  Screw the cap -A- with a screw -2- M8 x 60 mm to the bottom bearing for gearshift shaft -1-.
  N34-1003
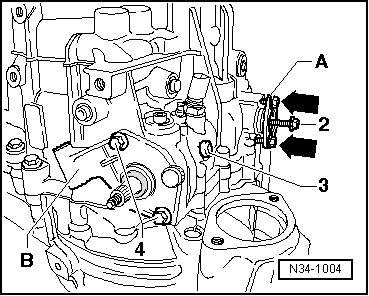
–  Insert cap -A- manually by alternatively tightening (1/2 turn) the screws -arrows-.
–  Unscrew the screw -2- and for this operation screw in the original screw by hand.
–  Install gearshift cover -B- for gearshift shaft and tighten the hexagon screws -4- to tightening torque → Chapter.
–  Now tighten the hexagon screws for the cap to tightening torque → Chapter.
–  Insert locking screw -3- for the sliding-block of the gearshift shaft with locking agent -D 000 600 A2- and tighten to tightening torque → Chapter.
–  Install reversing light switch and tighten to tightening torque → Chapter.
  N34-1004
–  Install both flange shafts with pressure springs, stop discs and conical rings.
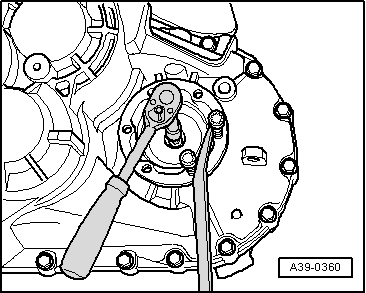
–  Install speedometer sender → Chapter.
  A39-0360
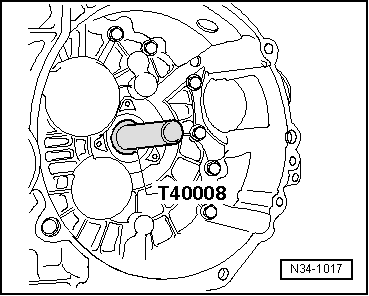
–  Drive in the gasket ring for the drive shaft.
–  Mount slave cylinder with release bearing → Chapter.
  N34-1017
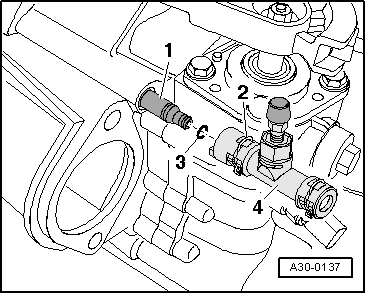
–  Insert new O-ring -3- at the connection -1- of the slave cylinder.
–  Press on the bleeder -4- at the connection of the slave cylinder until the retaining clip -2- clicks into place.
–  For checking pull at bleeder.
–  Shift through all gears consecutively.
–  Remove gearbox from assembly stand.
  A30-0137

Disassembling and assembling the gearbox for gearbox as of gearbox manufacturing date 07.03 > < Disassembling gearbox