
Fabia Mk1
|
|
|
|
|
|
|
|
|
|
|
 Note
Note
|
|
|
|
|
|
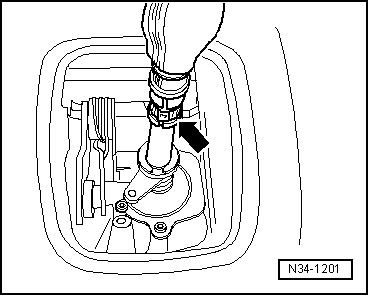
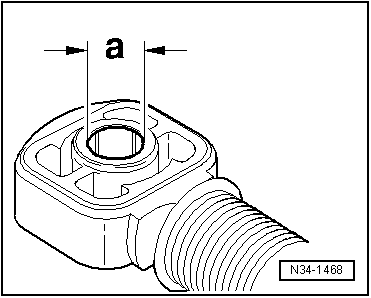
| Cable lock for: | Dimension “a” |
| Shift cable at gearbox shift lever | 10 mm |
| Selector cable at relay lever | 8 mm |
|
|
|
|
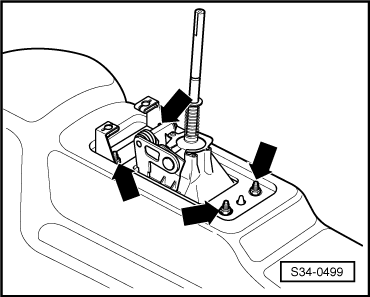
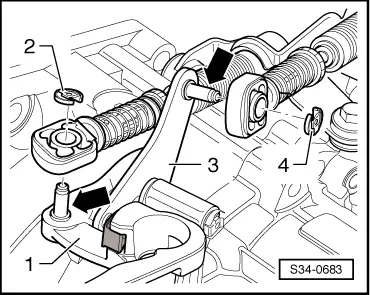
| Tightening torques |
| Component | Nm |
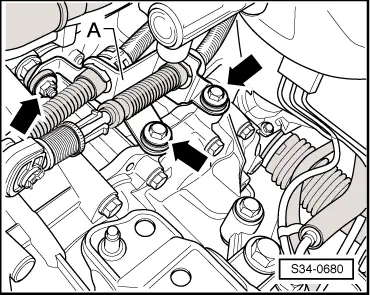
| Shift housing to body | → Chapter |
| Cable support to gearbox | → Chapter |
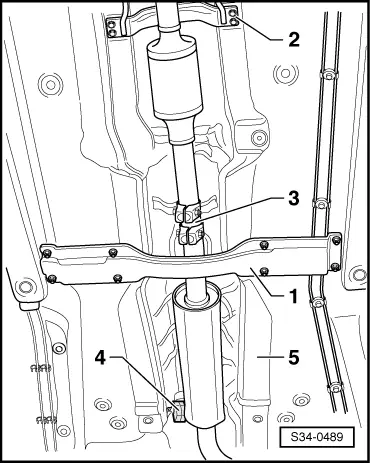
| Bracket for front exhaust pipe to body | → Engine; Rep. Gr.26 |
| Strut to body | 25 |