Skoda Workshop Service and Repair Manuals
HOME
FEATURES
MENU
INDEX
ABOUT US
Door trim panels >
< Removing and installing brake element and glove compartment flap on passenger side
Fabia Mk2
Body
Body Work
Trim, noise insulation / Dash panel
Removing and installing the central tube/dash panel
Removing and installing the central tube/dash panel
Removing and installing the central tube/dash panel
Removing:
Note
The work sequence may differ slightly on individual models depending on the equipment version.
–
Removing dash panel
→ Chapter
.
–
Remove crash strut in front of the clutch pedal
→ Manual gearbox
→ Rep. gr.30
.
–
Remove the steering column from the central pipe
→ Chassis
→ Rep. gr.48
.
–
Remove relay carrier from central pipe
→ Electrical System
→ Rep. gr.97
.
–
Remove the convenience system control unit from the central pipe
→ Electrical System
→ Rep. gr.90
.
–
Removing headlight control unit
→ Electrical System
→ Rep. gr.94
.
–
Remove air guide duct to the defroster vents and air guide duct for dash panel vents
→ Heating and Air conditioning
→ Rep. gr.87
.
–
Remove the heating module carrier from the central pipe - 5 Nm
→ Heating and Air Conditioning
→ Rep. gr.87
.
–
Fixing screws (20 Nm) and remove screws for frequency link.
–
Remove the plenum chamber cover
→ Chapter
.
–
Remove screw
-1-
(25 Nm) in the plenum chamber.
–
If the frequency link is removed, remove screw
- 2 -
(9 Nm) and take out frequency link.
–
Release all electrical lines from the central pipe.
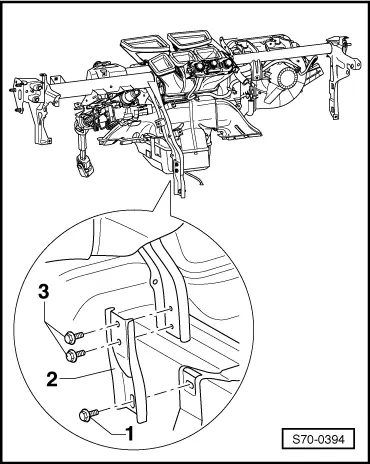
–
Remove screw (20 Nm)
-1-
and screws (9 Nm)
-3-
from the dash panel support
-2-
.
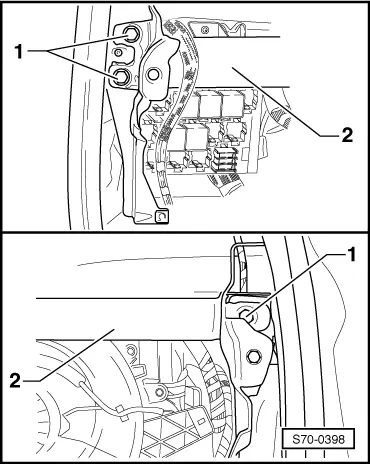
–
Remove the fixing screws
-1-
(20 Nm) and take out the central pipe
-2-
.
Installing:
–
Installation is carried out in the reverse order.
Body
Body Work
Trim, noise insulation / Dash panel
Removing and installing the central tube/dash panel
Door trim panels >
< Removing and installing brake element and glove compartment flap on passenger side
 Note
Note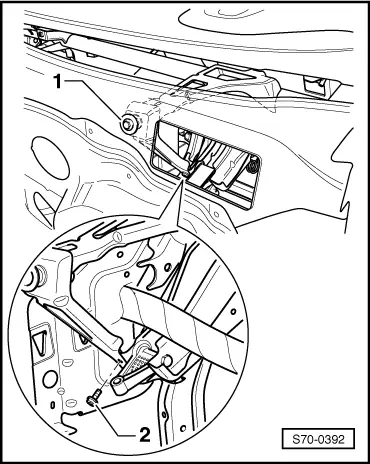
 Note
Note