skoda Workshop Repair Guides

Skoda Workshop Service and Repair Manuals

Installing (set the timing) > < Removing and installing toothed belt
Removing
Removing
  Caution
When undertaking all installation work, particularly in the engine compartment due to its cramped construction, please observe the following:
t  If the toothed belt is replaced when carrying out engine repair (apart from regular change interval), it should be entered in the Service Schedule!
t  Lay lines of all kinds (e.g. for fuel, hydraulic fluid, cooling fluid and refrigerant, brake fluid, vacuum) and electrical lines in such a way that the original line guide is re-established.
t  In order to avoid damage to the cables, ensure that there is adequate free access to all moving or hot components.
  Note
t  Safety precautions when working on the fuel supply system → Chapter.
t  Observe rules for cleanliness → Chapter.
–  Put the shift lever into Neutral in order to turn the crankshaft.
–  Switch off ignition and withdraw ignition key.
–  Remove engine cover → Chapter.
–  Remove V-ribbed belt → Chapter.
For vehicles Fabia II, Roomster
   
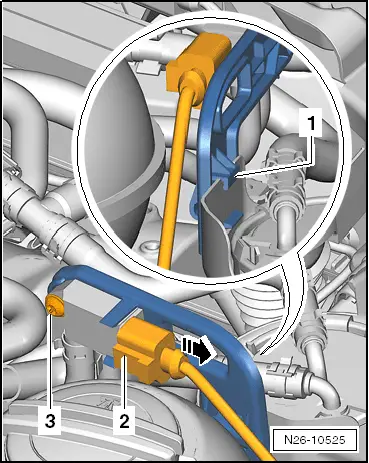
–  Disconnect the plug connection -2- at the differential pressure sender -G505-.
–  Release screw -3- and remove differential pressure sender -G505- from bracket.
–  Place the differential pressure sender -G505- with line to the rear.
Continued for all vehicles
  N26-10525
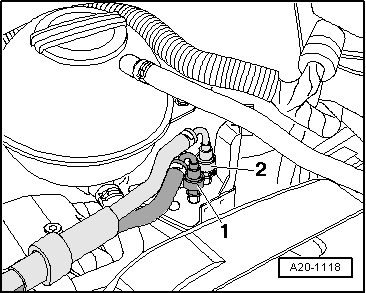
–  Separate fuel feed line -2- and fuel return-flow line -1-, to do so press the release buttons. Unlock the quick coupling and disconnect → Chapter.
–  Collect the fuel which flows out with a cloth.
For the vehicles Fabia II, Roomster
  A20-1118
–  Unlock the catch peg with a finger and pull the fuel preheating valve upwards out of the guide of the coolant expansion bottle.
For vehicles Rapid
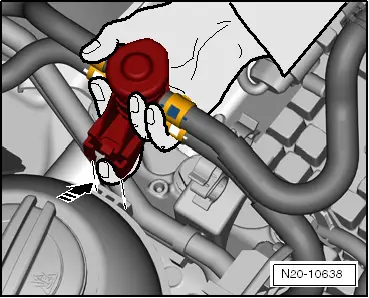
  N20-10638
–  Unlock the catch peg with a finger and pull the T-piece upwards out of the guide from the coolant expansion bottle.
Continued for all vehicles
–  Unclip the fuel line from the plastic holders.
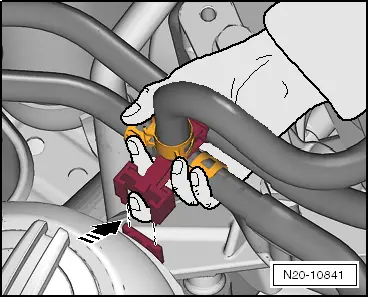
  N20-10841
–  Push the catch pegs towards the outside and remove the fuel filter towards the top.
–  Place the fuel filter and the fuel hoses together with the fuel preheating valve on the engine.
–  Remove fuel filter bracket.
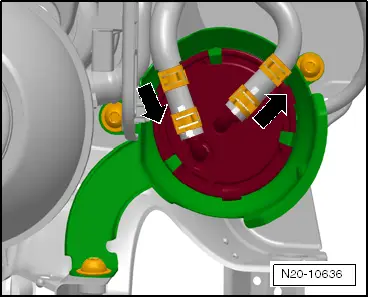
  N20-10636
–  Unscrew the screws of the coolant expansion bottle -arrows-.
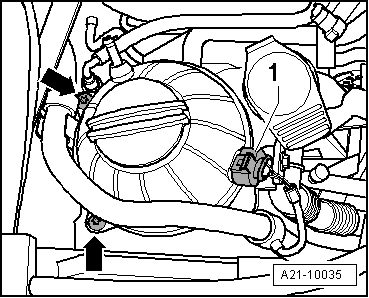
–  Remove the plug -1- from the expansion bottle and push the expansion bottle to the side.
  A21-10035
–  Remove top part of toothed belt guard; to do so release retaining clips -arrows-.
–  Remove crankshaft-belt pulley → Chapter.
  Note
Do not lock tensioning element for V-ribbed belt.
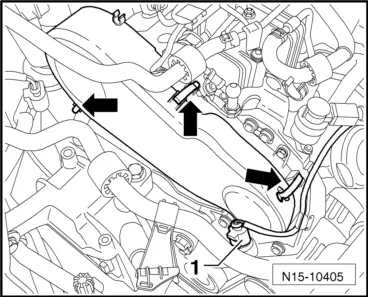
  N15-10405
–  Release screws -arrows-.
–  Remove bottom toothed belt guard.
l  Remove the engine support before exchanging the tensioning pulley and removing and installing the toothed belt.
  Note
t  The assembly bracket must only be removed if the engine is supported with the supporting device -MP9-200 (10-222A)-!
t  Only release the engine support if the assembly bracket is removed.
–  Remove engine support → Chapter.
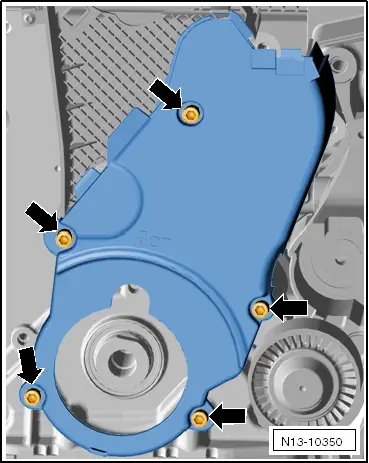
  N13-10350
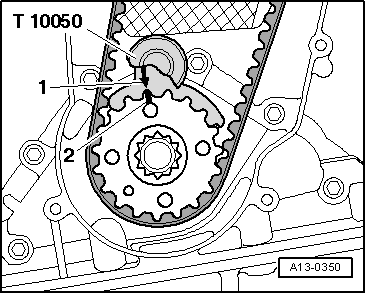
–  Rotate the crankshaft on TDC in direction of rotation of the engine and remove the crankshaft timing belt sprocket with the crankshaft arrester -T10050-. Slide the crankshaft arrester from the front side of the toothed belt sprocket into its teeth.
  Note
The markings on the crankshaft - toothed belt sprocket -2- and on the crankshaft arrester -T10050--1- must be aligned. While doing so, the stud of the crankshaft arrester -T10050- must engage in the hole of the sealing flange.
  A13-0350
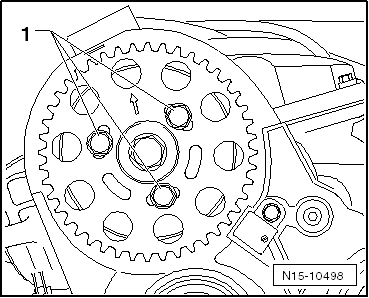
The arrow on the camshaft sprocket must be close to the »12 o'clock« position.
  N15-10498
–  Slacken the screws -arrows- for the camshaft sprocket by approx. 90°.
  A15-10798
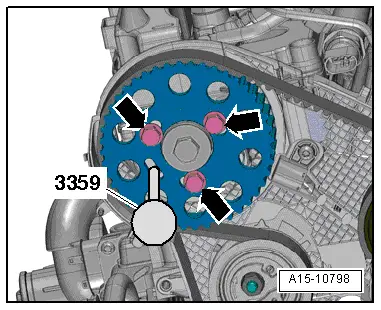
–  Slacken the screws -2- for the toothed belt sprocket at the high pressure pump by approx. 90° using the socket insert XZN 10 -T10385-.
Tensioning pulley A
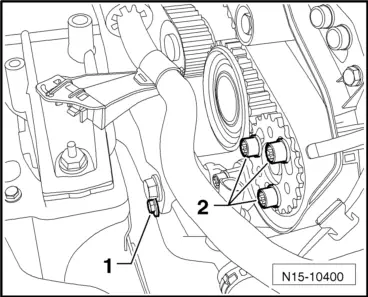
  N15-10400
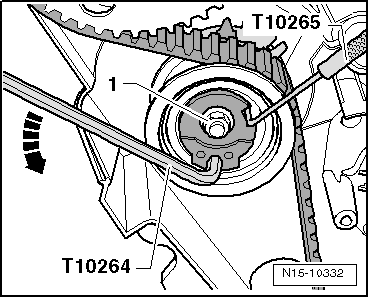
–  Loosen nut -1- for tensioning pulley.
–  Turn the eccentric of the tensioning pulley with the offset screwdriver -T10264- in -direction of arrow- (anti-clockwise), until the tensioning pulley can be interlocked with the rig tool -T10265-.
  N15-10332
–  Afterwards, turn the eccentric of the tensioning pulley with the offset screwdriver -T10264- in -direction of arrow- up to the stop and tighten nut -1- by hand.
Tensioning pulley B
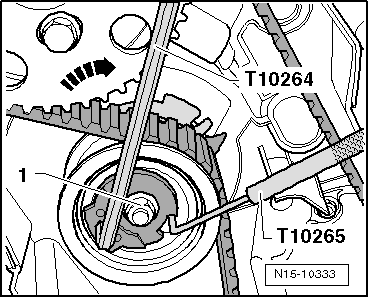
  N15-10333
–  Loosen nut -1- for tensioning pulley.
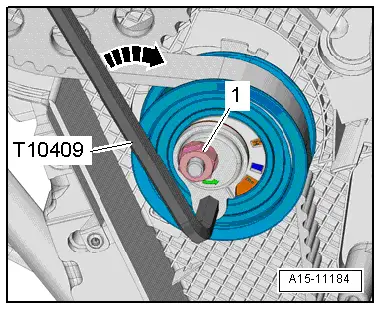
–  Turn the eccentric of the tensioning pulley in -direction of arrow- (clockwise) using the offset screwdriver -T10409- until the tensioning pulley is slackened (eccentric element in approx. 9 o'clock position) and tighten the nut -1- by hand.
Proceed as follows for both tensioning pulleys
  Caution
Risk of damage through reversing the rotation direction of an already used toothed belt.
If the toothed belt is re-installed, mark the direction of rotation with chalk or a felt-tip pen before removing it.
–  First of all remove the toothed belt from the large guide pulley and then from the remaining toothed belt gears.
  A15-11184

Installing (set the timing) > < Removing and installing toothed belt