skoda Workshop Repair Guides

Skoda Workshop Service and Repair Manuals

Testing fuel pump > < Separating quick couplings
Removing and installing the fuel tank
(Fabia II, Roomster, Rapid)
Special tools and workshop equipment required
t  Engine/gearbox jack, e.g. -V.A.G 1383 A-
Conditions
l  Ignition is switched off and ignition key is withdrawn.
l  The fuel tank must not be more than 1/4 full.
Removing
  Note
t  Observe the safety instructions before starting fitting work → Chapter.
t  Observe rules for cleanliness → Chapter.
–  Unscrew the cap from the filler neck.
–  Close the opening of the fuel filler neck with a clean foam piece, so that no dirt can penetrate.
Vehicles Fabia II
–  Position right rear seat vertically → Body Work; Rep. gr.72.
Vehicles Roomster
–  Fold back the middle and rear seat and position vertically → Body Work; Rep. gr.72.
Vehicles Rapid
–  Removing rear seat bench → Body Work; Rep. gr.72.
Continued for all vehicles
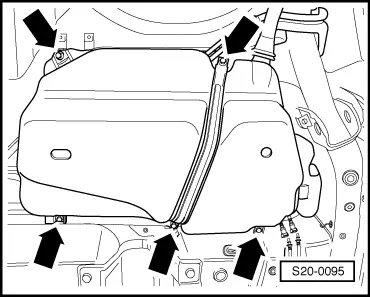
–  Remove the cover of the fuel delivery unit under the mat.
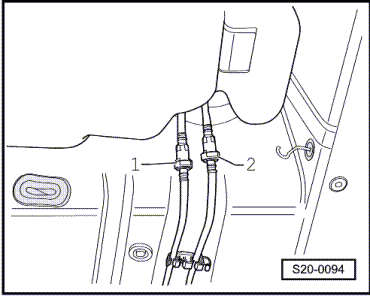
–  Unplug the 5-pin plug from the fuel delivery unit.
–  If necessary drain the fuel tank → Chapter.
–  Removing rear axle → Chassis; Rep. gr.42.
–  Remove the rear right wheelhouse liner → Body Work; Rep. gr.66.
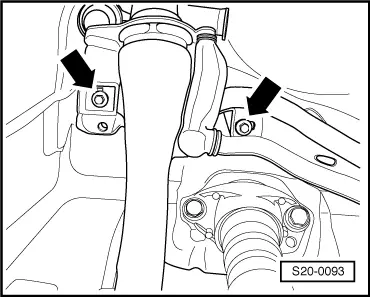
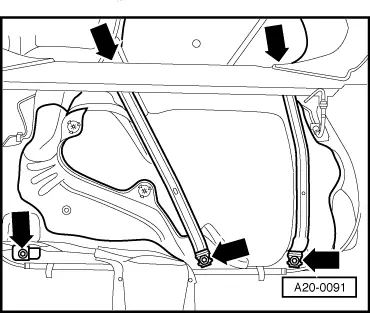
–  Remove rear part of exhaust system:
t  Fabia II → Chapter.
t  Roomster → Chapter.
t  Rapid → Chapter.
   
–  Unscrew bolts on filler neck -arrows-.
  S20-0093
–  Disconnect feed line (black) -1- and return-flow line (blue) -2- from the fuel tank, to do so press the release buttons. Unlock the quick coupling and disconnect → Chapter.
For vehicles Roomster, Rapid
–  Remove tensioning strap over the heat protection plate
–  Remove the heat shield cover of the fuel tank.
For all vehicles
–  Support fuel tank using the engine/gearbox jack -V.A.G 1383 A -.
For vehicles Fabia II
  S20-0094
–  Unscrew tensioning strap and fixing screws -arrows-.
For vehicles Roomster, Rapid
  S20-0095
–  Unscrew the remaining tensioning strap and fixing screw -arrows-.
For all vehicles
–  Pull the filler neck out of the rubber bowl and swivel the fuel tank downwards.
Install
Installation is carried out in the reverse order. Pay attention to the following:
–  Check if the earth lead shows traces of oxidation on both connections, remove if necessary.
  A20-0091
–  Check fitting position of the earth lead -1-.
l  The plug -1- on the metal plate ring -2- must be placed on firmly.
l  The contact tab -4- must be hung in the fuel tank -3- and secured with the spacer bush -5-.
t  Lay the fuel lines avoiding any kinks.
t  Do not mix-up the feed line and the return-flow line (the return-flow line is blue, the feed line is black).
t  Make sure the connections fit tightly.
t  Check feed line and return-flow line at fuel tank for firm seating.
Before starting the engine, the fuel system must be bled as follows:
–  Switch on the ignition and only switch it off once the fuel pump has come to a standstill. Repeat this procedure at least »5 times«.
  S20-0242

Testing fuel pump > < Separating quick couplings