skoda Workshop Repair Guides

Skoda Workshop Service and Repair Manuals

Setting the timing > < Summary of components
Test timing
Test timing
Special tools and workshop equipment required
t  Fixing bolts -T10414-
t  Locating screw -T10340-
Test sequence
Vehicles with auxiliary heating.
   
–  Unscrew the screws -1 and 2- of the brackets for the coolant pipes for the auxiliary heating -3-.
Continued for all vehicles
  S10-0425
–  Release fixing screws -1- and remove bracket for coolant pipe -2-.
  N13-10385
–  Release screw plug -arrow- at cylinder block.
  N13-10383
–  Turn the fixing screw -T10340- up to the stop in the cylinder block.
  Caution
If the fixing screw -T10340 - cannot be screwed in up to the stop, the crankshaft is not in the correct position!
In this case proceed as described below.
–  Unscrew the fixing screw.
–  Turn crankshaft 90° (1/4 turn) in direction of rotation of engine.
–  Turn the fixing screw -T10340- up to the stop in the cylinder block.
–  Tighten fixing screw -T10340- to 30 Nm.
–  Turn crankshaft up to the stop in direction of rotation of engine.
The crankshaft is locked in direction of rotation of engine with the fixing screw -T10340-.
  N13-10384
–  Separate the hoses -1- from the non-return valve.
–  Release the fixing screw -2- and pull the non-return valve out of the cylinder head cover.
  N13-10382
The grooves in the camshaft -arrows- must be in the position shown.
  N13-10381
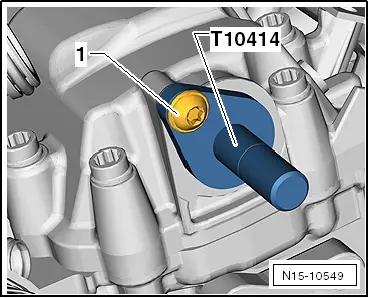
–  Insert the fixing bolt -T10414- up to the stop into the cylinder head cover.
If the fixing bolt -T10414- cannot be inserted up to the stop into the camshaft opening, the timing is not correct and must be set → Chapter.
The timing is O.K., if the fixing bolt -T10414- can be pushed up to the stop into the cylinder head cover.
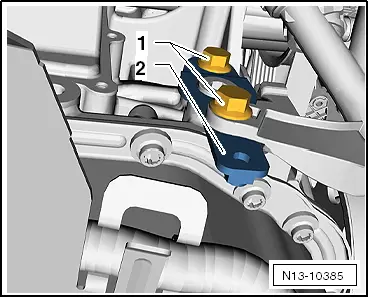
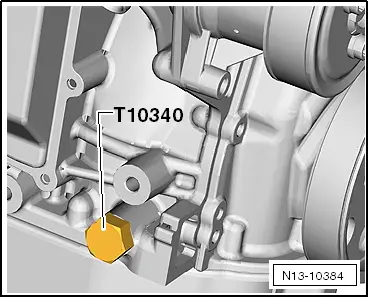
–  Remove fixing bolt -T10414- and fixing screw -T10340-.
Further installation occurs in a similar way in reverse order to removal.
  N15-10549

Setting the timing > < Summary of components