
Octavia Mk1
 Note
Note
|
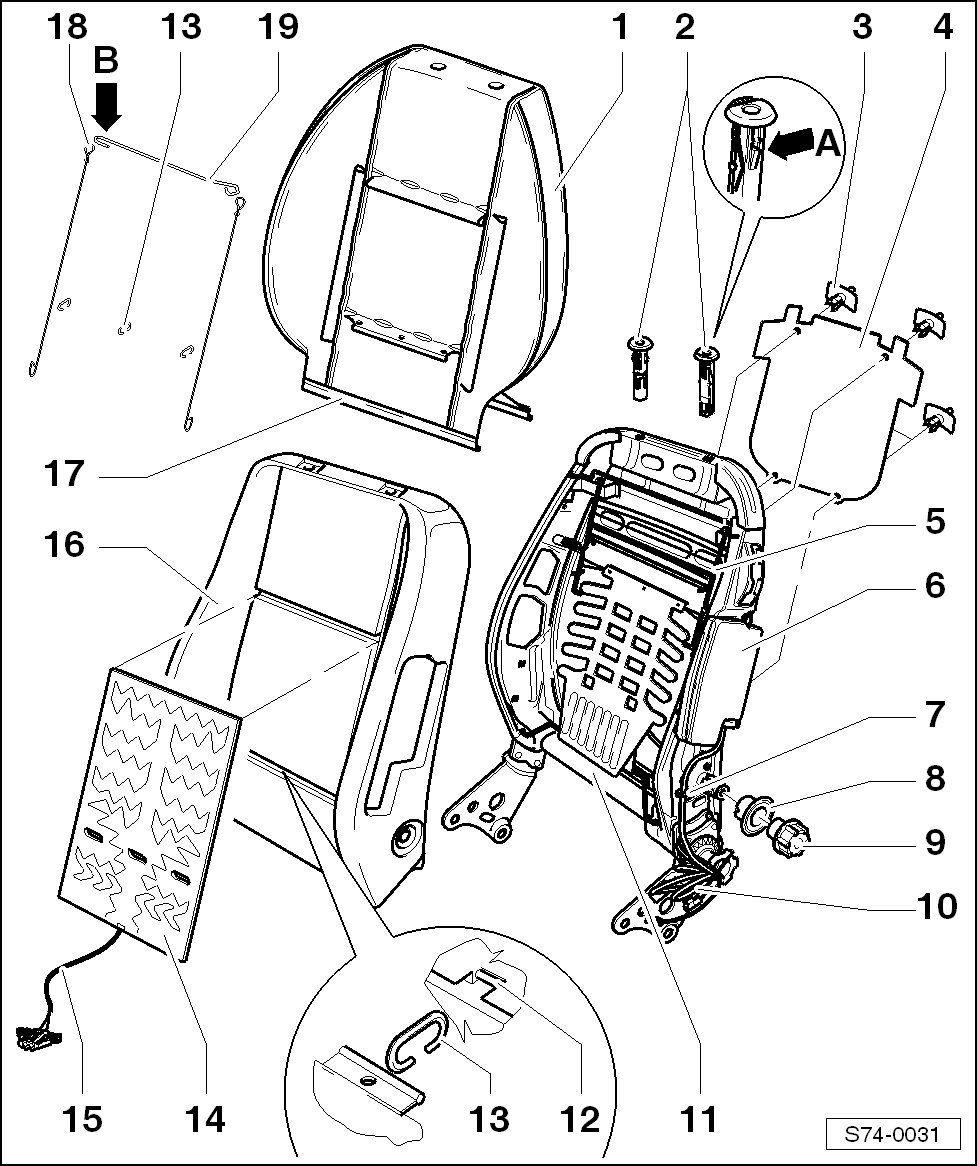
| 1 - | Cover |
| q | removing: |
| l | Seat removed from vehicle and backrest rack removed from seat rack |
| – | Detach rosette -9- and grommet -8-. |
| – | Fully unhook clamping section -17- at the bottom cover side. |
| – | Roll up the cover approx. 1/4 towards the top. |
| – | Remove covers in the lower area of the frame out of the openings for the longitudinal wires -18-. |
| – | Unhook the longitudinal wires -18- out of the openings in the lower area of the backrest using the pliers. |
| – | Cut through clips -13-. |
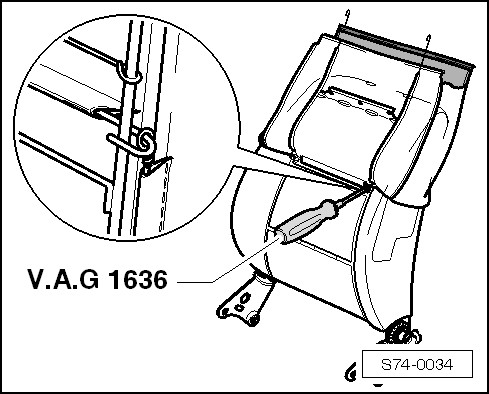
| – | Unhook the -V.A.G 1636- transverse wire of the cover -19- out of the longitudinal wires -5- of the backrest frame -11- using an upholstery reamer. |
| – | Roll up the cover towards the top and remove. |
| – | Remove foam upholstery -16-. |
| q | Installing: |
| – | Insert foam upholstery -16- into the backrest frame -11-. |
| – | Insert the longitudinal wires -18- and the transverse wire -19- in the cover. |
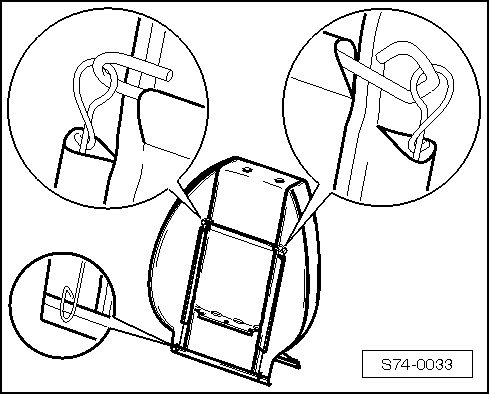
| – | Connect wire eyelets → Fig.. |
| – | Place cover onto the top backrest frame with foam upholstery. |
| – | Hook the transverse wire of the cover -19- into the longitudinal wires -5- of the backrest frame -11- using an upholstery reamer -V.A.G 1636- → Fig.. |
| – | Pull off the cover by 3/4. |
| – | Clip the cover with the aid -V.A.G 1634- with clips -13- to the transverse wire -12- of the foam upholstery -16- in the middle and on the sides. |
| – | Pull off the cover and align. |
| – | Cut openings into the foam upholstery -16- in the opening points of the lower backrest area. |
| – | Insert longitudinal wires -18- in the openings of the lower backrest area with pliers → Fig.. |
| – | Position the covers in the lower area of the frame into the openings for the longitudinal wires -18-. |
| – | Connect both clamping sections of the cover -17-. |
| – | Place grommet -8- and rosette -9-. |
| 2 - | Headrest guides |
| q | when removing press safety catch -arrow A- e.g. with a specially adapted screwdriver and remove the guides. |
| q | when installing press the guides into the backrest frame |
| 3 - | Button rivet |
| q | for installing the protective cover -4- |
| 4 - | Protective cover |
| q | removing and installing into the backrest frame -11- |
| 5 - | Longitudinal wire of the backrest rack |
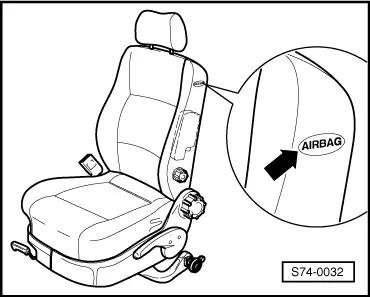
| 6 - | Airbag unit |
| q | removing and installing → Chapter |
| 7 - | Terminal el. wire airbag |
| q | removing and installing → Chapter |
| 8 - | Grommet |
| 9 - | Rosette for the lumbar region backrest |
| q | remove from the shaft of the backrest control |
| 10 - | El. wire of the airbag unit |
| q | removing and installing → Chapter |
| q | do not damage when installing |
| 11 - | Backrest rack |
| 12 - | Foam upholstery transverse wire |
| 13 - | Clamps |
| q | when removing cut through with pliers |
| q | to install use upholstery pliers, e.g. -V.A.G 1634- |
| 14 - | Heating element for backrest |
| q | removing: |
| – | Heat up the adhesive point of the foam upholstery with hot-air blower or blow dryer and remove from the foam upholstery. |
| q | Installing: |
| – | Remove the protective foil from the self-adhesive surface of the heating element. |
| – | Glue the heating element with the top side onto the upper edge of the foam upholstery -16-. |
| 15 - | El. wire of the heating element |
| 16 - | Foam padding |
| q | remove from backrest rack |
| 17 - | Clamping section of cover |
| 18 - | Longitudinal wire of cover |
| q | Check fitting position |
| 19 - | Transverse wire of the cover |
| q | Check fitting position |
| q | opened wire eyelet -arrow B- points to the airbag unit |
|
|
|
|
|
|
|

|