| Removing and installing parts of the lubrication system |

Note | t
| If considerable quantities of metal swarf or abrasion (caused by rubbing damage such as damage to the crankshaft and conrod bearings) is found in the engine oil when carrying out engine repairs, carefully clean the oil galleries in order to avoid consequential damage. |
| t
| The oil level must not be above the max. marking - risk of damage to catalytic converter! |
| Check the oil capacity, oil specification and oil level → Octavia. |
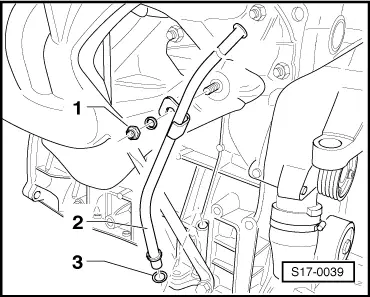
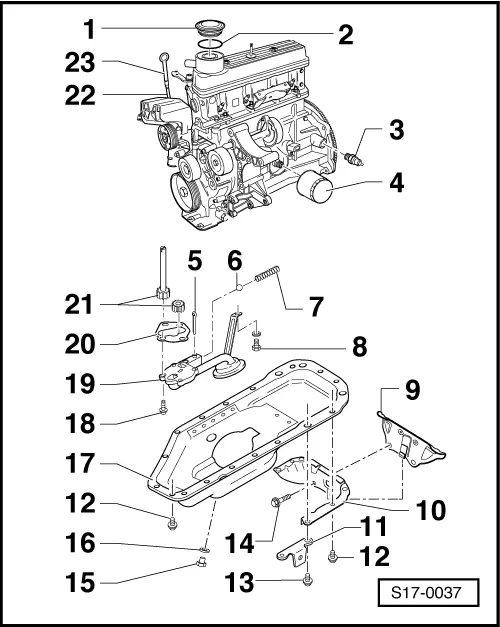
| 3 - | Oil pressure switch -F1-, 45 Nm |
| –
| Cut open gasket ring if leaking and replace |
| –
| slacken with tensioning strap |
| –
| pay attention to installation instructions on oil filter |
| –
| pay attention to change intervals |
| –
| for pressure relief valve |
| –
| when installing, knock in slightly with aluminium drift so that the seat of the ball is smoothened |
| –
| for pressure relief valve |
| –
| clamped onto oil pan support |
| –
| if necessary also welded with oil pan |
| –
| for middle coolant pipe |
| 15 - | Oil drain plug, 30 Nm |
| 19 - | Oil pump cover with pressure relief valve |
| –
| Opening pressure: approx. 0.46 MPa overpressure |
| –
| Clean strainer if dirty |
| –
| install only if insufficient axial play of oil pump gears |
| –
| Inspecting axial play → Fig. |
| –
| removing and installing → Fig. |
| –
| oil level must not exceed max. marking! |
|
|
|